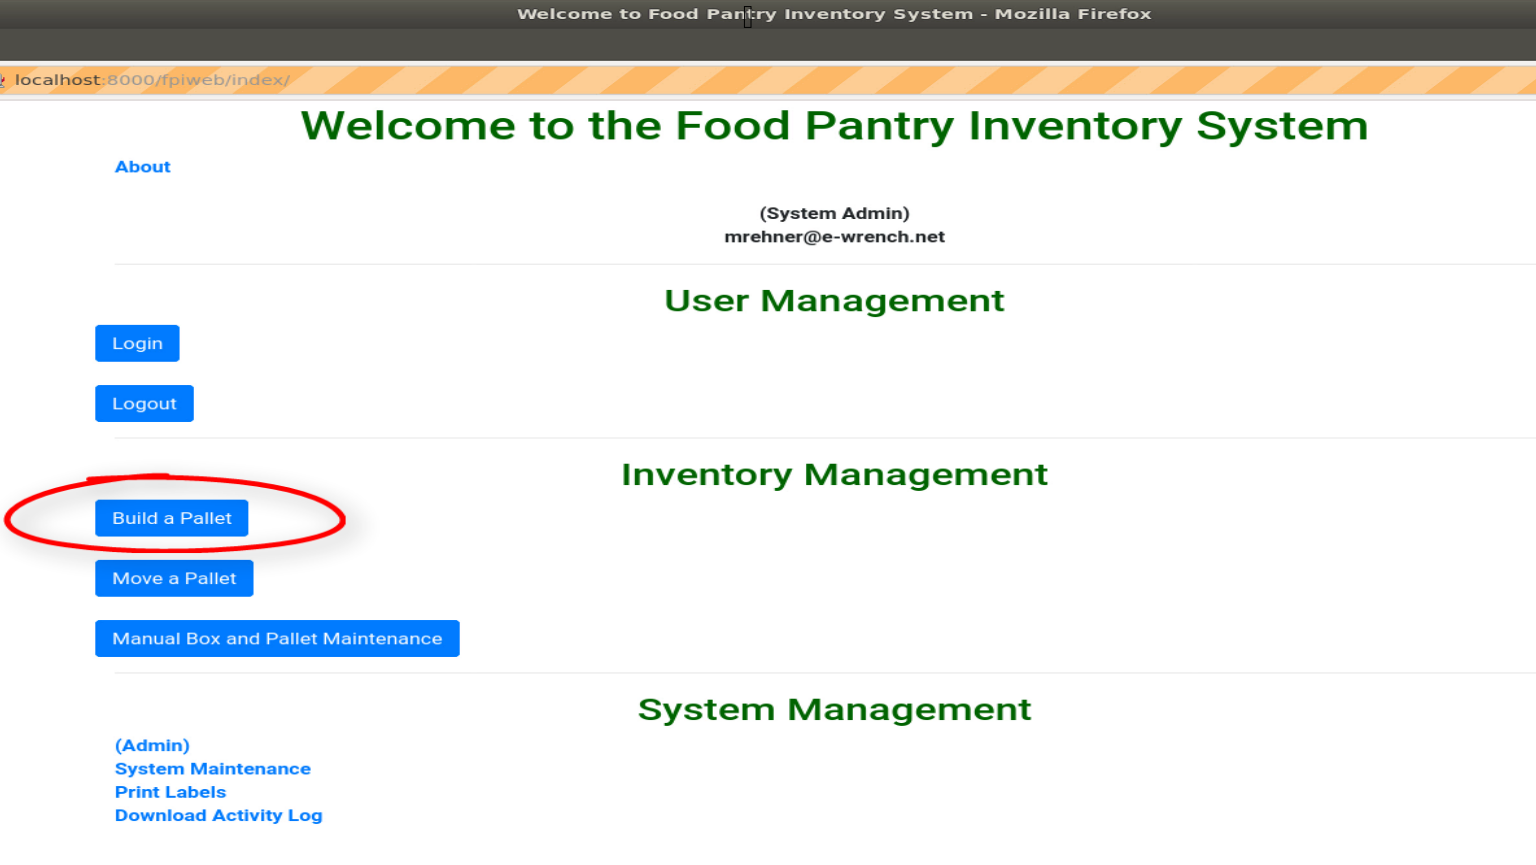
1.3. Pallet Instructions
Describes how to manage a pallet of product, including adding boxes to a pallet, moving a pallet to an empty location, and moving boxes from one pallet onto a pallet that already has boxes on it to another location.
1.3.2. Pallet Screen
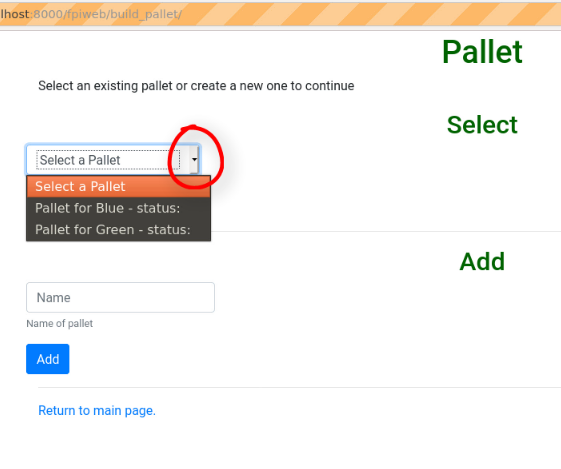
The next screen you will see is the Build Pallet screen. Here you will have two choices, Select or Add. Select gives you a choice of pallets to work with. If there are no pallets in Select, you must create a new pallet listing using Add.
Select
To check if there are pallets that you can select click on the ‘Dropdown icon’ shown below. If there are pallets available you will see a drop down list as shown below. Select one of the pallets from the drop down list.
If there are no pallets available nothing will show on the drop down list. You will have to go the Add section.
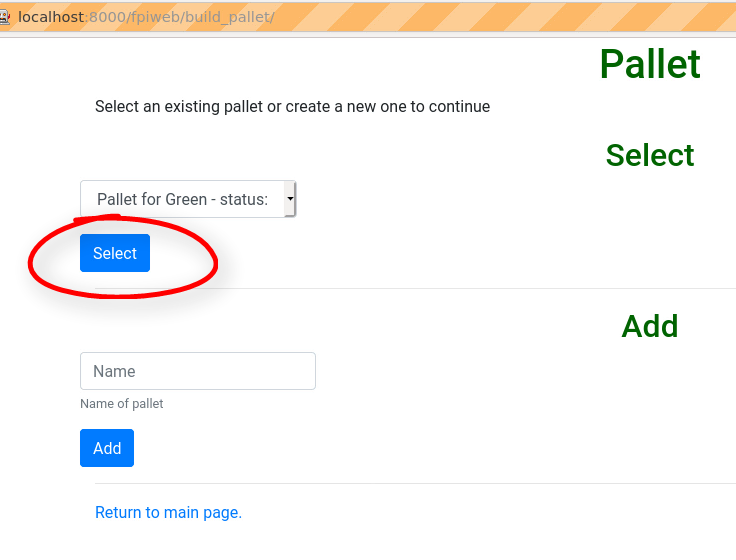
After selecting a pallet click on the Select button to go to the Build Pallet screen.
Add
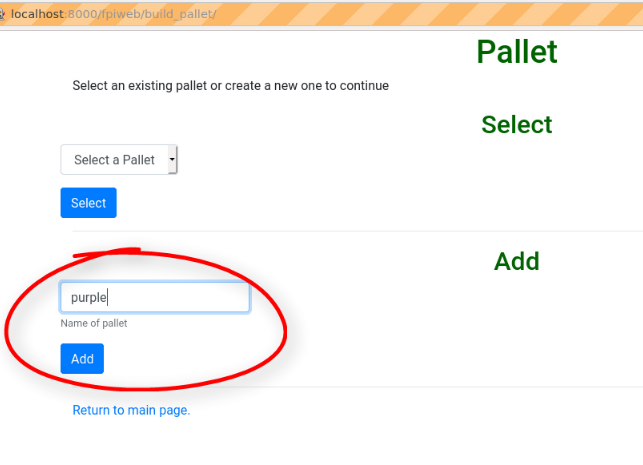
Enter or key in a pallet name. In the screen below the pallet the pallet name ‘purple’ has been entered. You can pick any name you choose. After keying in the new pallet name click on Add for the next screen.
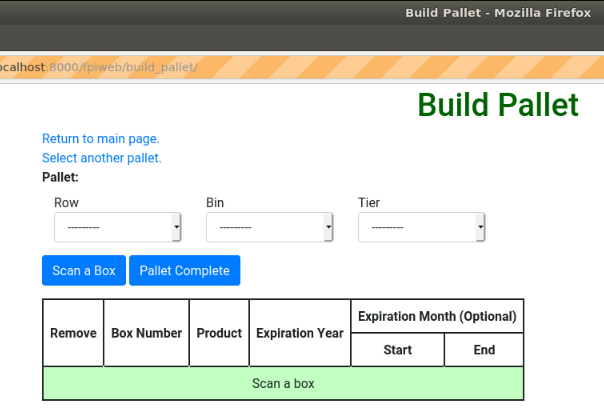
1.3.3. Build Pallet Screen
The next screen you will come to is the Build Pallet screen. On this screen the first thing you should do is to create a location for the pallet.
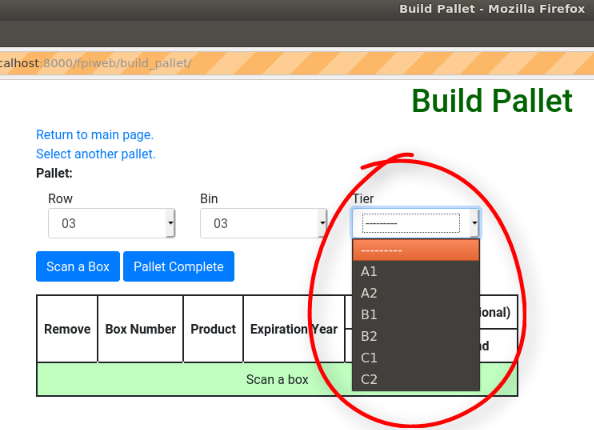
You will create the pallets location for ‘Row’, ‘Bin’ and ‘Tier’. Row refers to which long row the pallet is on. Currently rows are 2 bins wide. Bin refers pallet bins located down the length of the row. Tier refers to the height level of the location. Use the drop down list boxes to enter ‘Row’, ‘Bin’ and ‘Tier’.
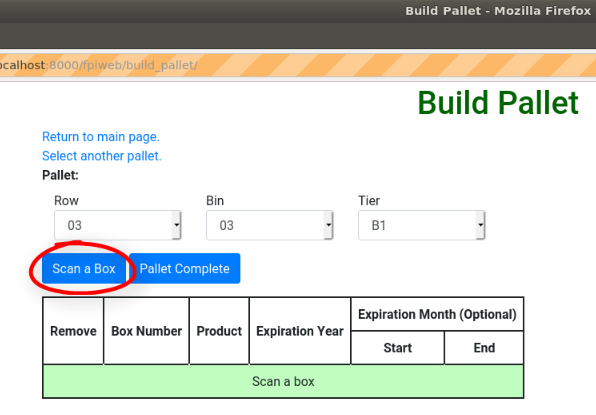
Once you have entered the pallet location, click on the Scan a Box button in the middle of the Build Pallet page.
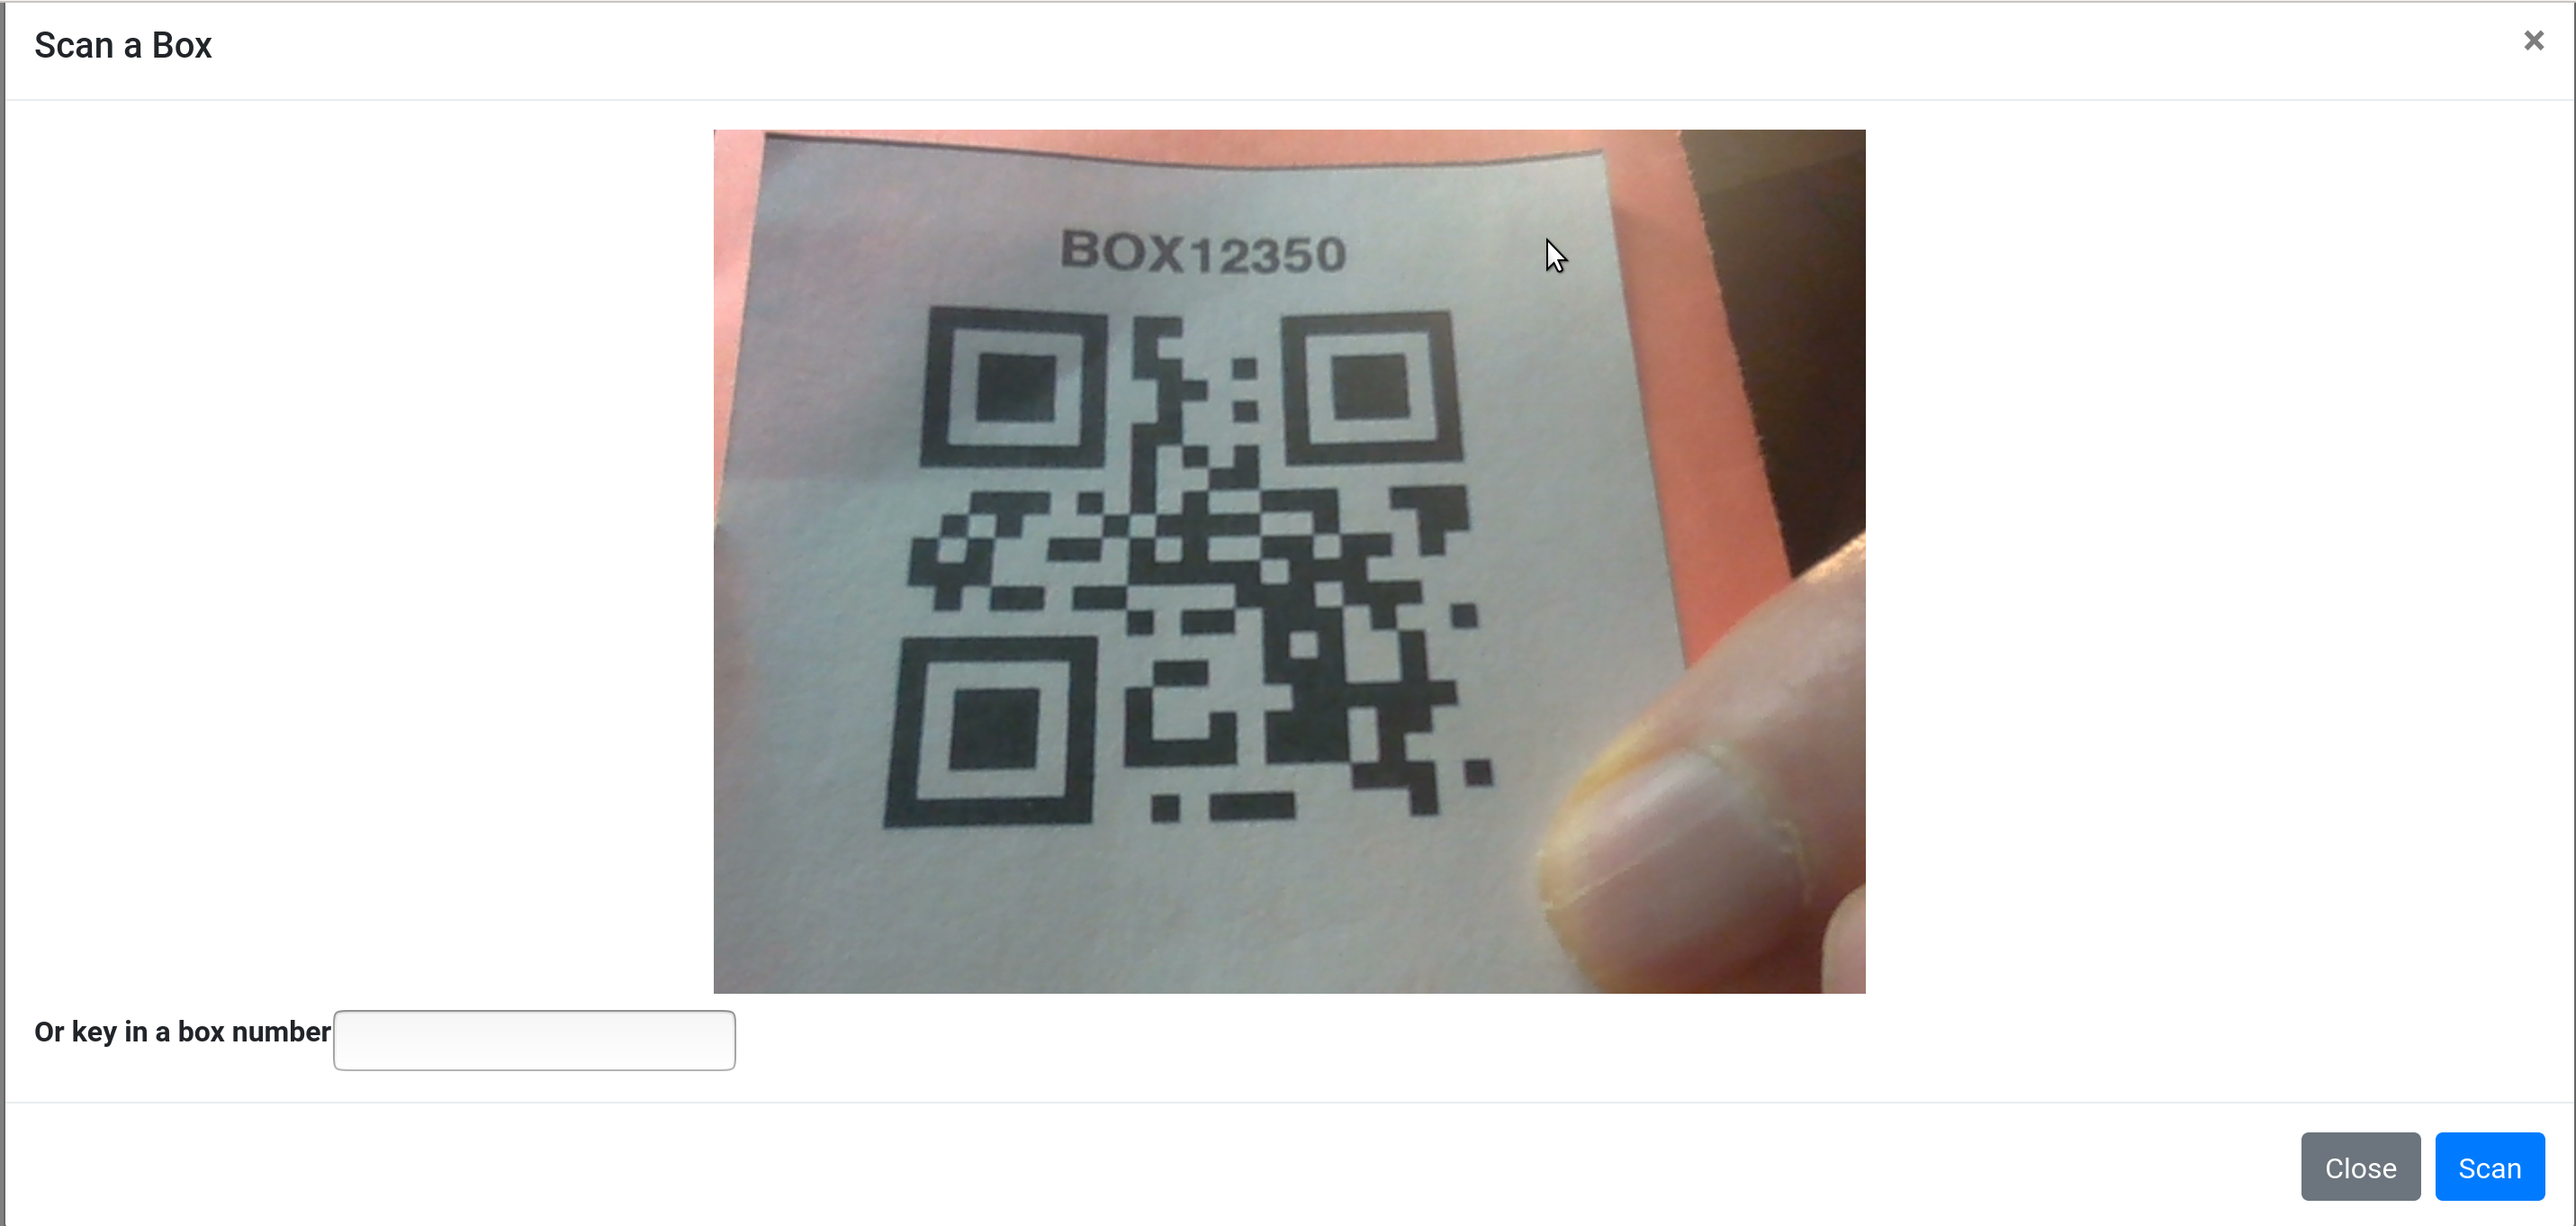
You will be directed to a Scan a Box popup window. If your computer has a camera you will be asked to enter a QR code. QR is short for Quick Response and is simply a funny looking label that can be read by computers.
Scan a Box QR code popup (for computers with a camera)
Use the camera on your computer to scan the QR code as shown below. Some computers may request your permission to use the computer camera. You will have to agree to the camera permission request to scan the QR code. In the image below an individual is holding a scan code up to the computer camera. With the QR code in the center of the ‘Picture Window’ click on the blue Scan button at the bottom right.
Occasionally there may be a situation where the computer is unable to scan the QR code, due to poor lighting or some other technical issue. In that case you can always add the QR code manually be entering or keying in the 5 digit box number manually in the pop up window at the bottom left. Then click the blue Scan button at the bottom right.
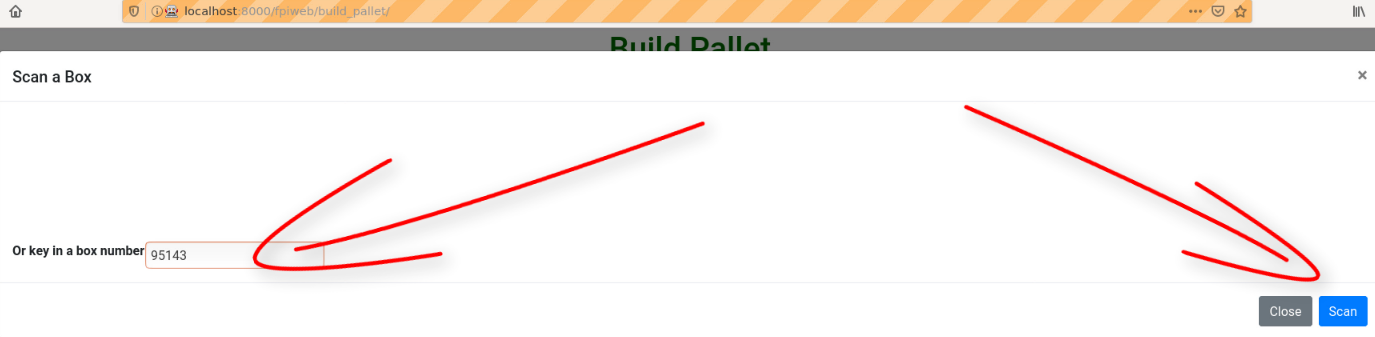
Scan a Box popup (for computers without a camera)
On this page you first have to enter or key in a 5 digit box number in the bottom left of the screen. You can enter any number but it must contain exactly 5 digits. Once you have entered the number click on the Scan button in the bottom right of the popup window.
1.3.4. Return to Build Pallet
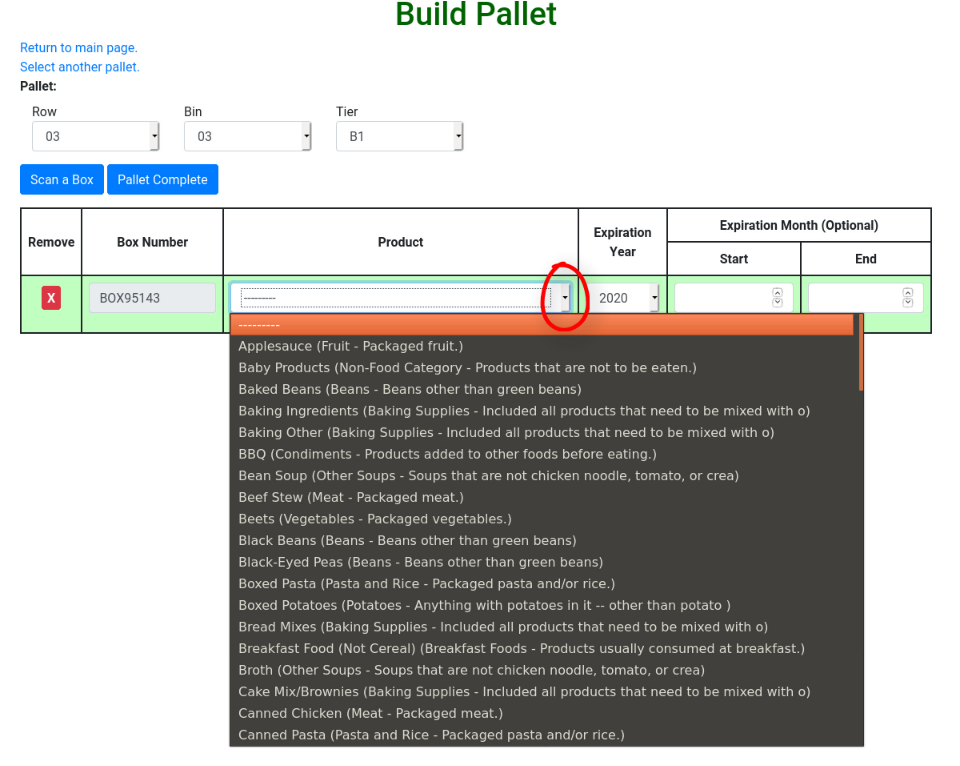
After clicking on the Scan Button you will be returned to the Build Pallet screen. You should see the ‘Box Number’ you have entered as well as a small white ‘X’ in a red box at the left of your screen. On this screen you will select a product to go in the box from a drop down product list. Click on the ‘Dropdown icon’ at the bottom right of the ‘Product’ rectangle’. Then choose an item from the list.
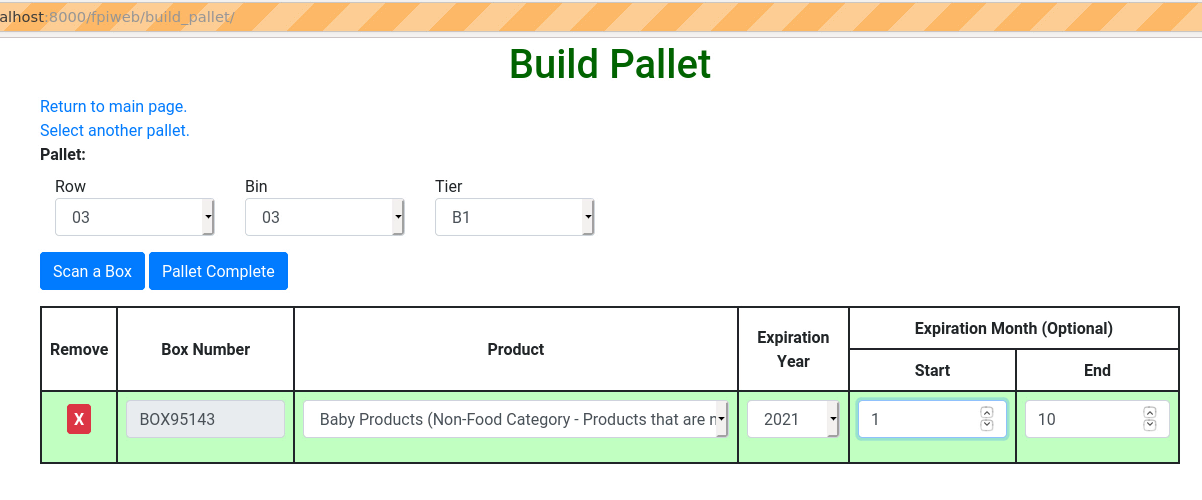
Once you have entered the product, use the ‘Expiration Year’ drop down list to enter the ‘Expiration Year’.
Entering the ‘Expiration Month’ is optional. Months are entered from a drop down list that holds numbers from 1 to 12 that correspond to the months of the year- January to December. If you do decide to enter the ‘Expiration Month’ please make sure that the ‘Start’ month is always less than the ‘End’ month. This means the ‘End’ month must not equal the ‘Start’ month and must be greater than the ‘Start’ month. Not all food items will have an ‘Expiration Month’ with a ‘Start’ and an ‘End’ month. Once you have entered everything on this page the page should look similar to what is below.
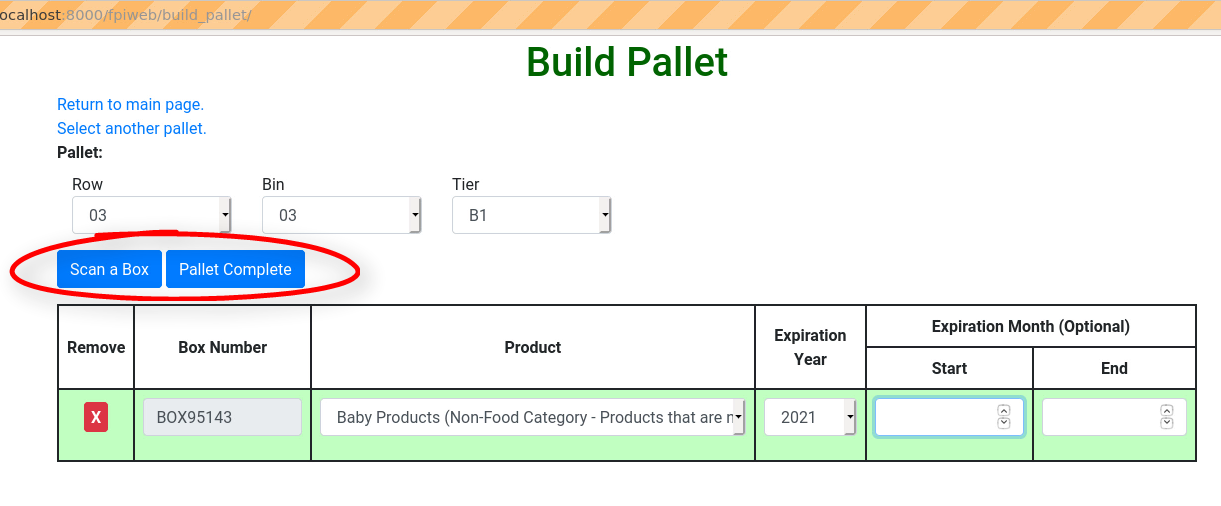
From here if you click on Scan a Box you will be directed back to the Scan a Box popup window. There you can add another box in the same manner as you did before. If you click Pallet Complete you will be directed to the Pallet Complete screen.
1.3.5. Pallet Complete
You should now see the Pallet Complete screen.
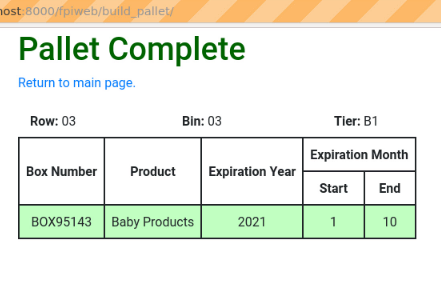
From here you can return to the main screen by clicking ‘Return to main page’.