1.2. Individual Box Instructions
After logging in click on the blue Manual Box and Pallet Maintence button as shown below to begin processing a box or a pallet. You will be directed to the Manual Box and Pallet Management screen.

1.2.1. Manual Box and Pallet Management Screen
To manually manage a pallet click on the Manage a pallet manually link as shown below.
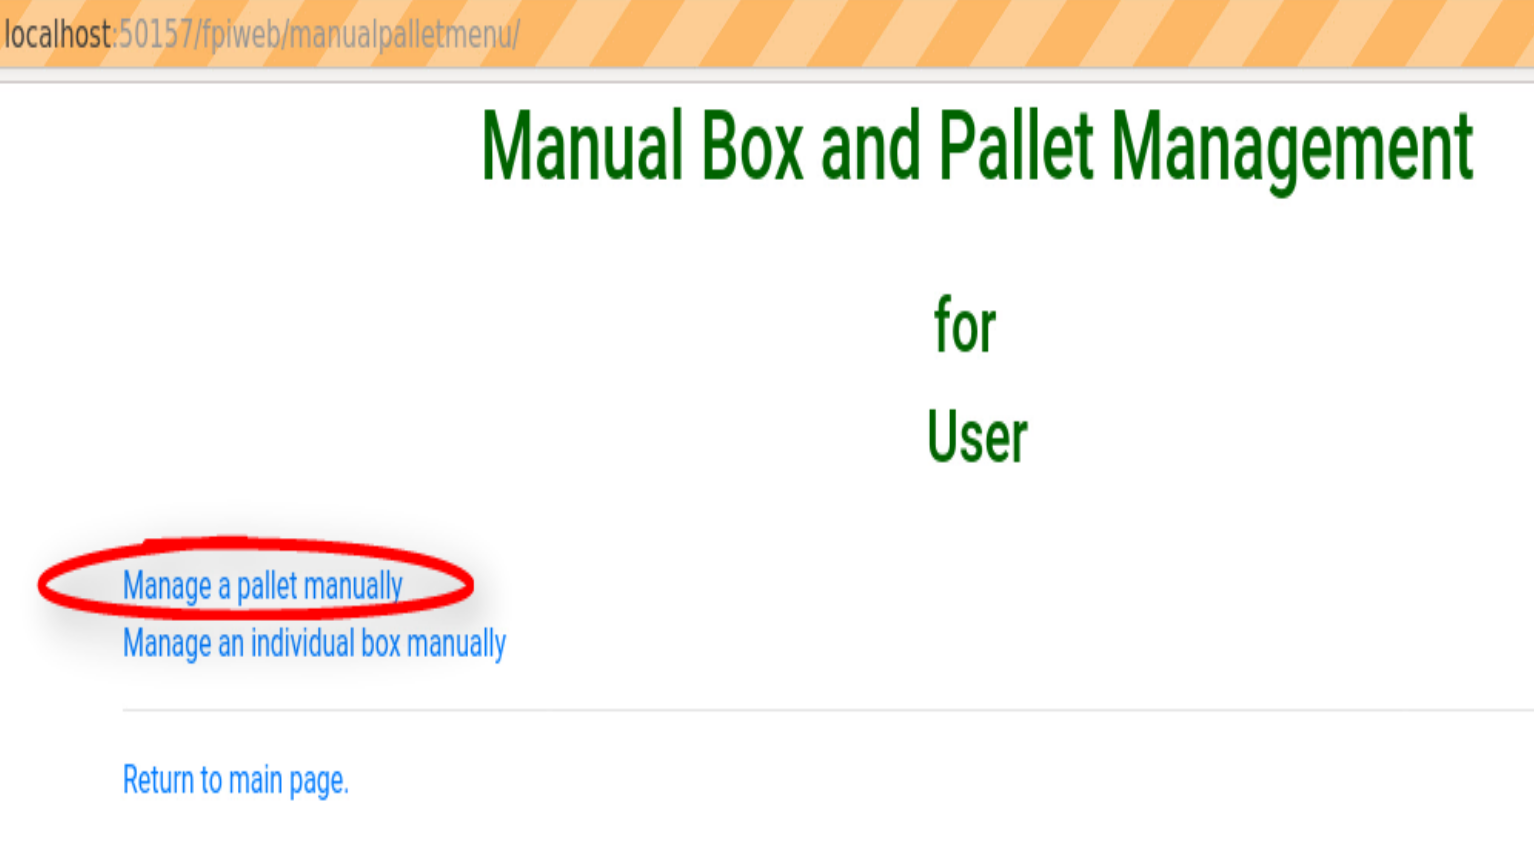
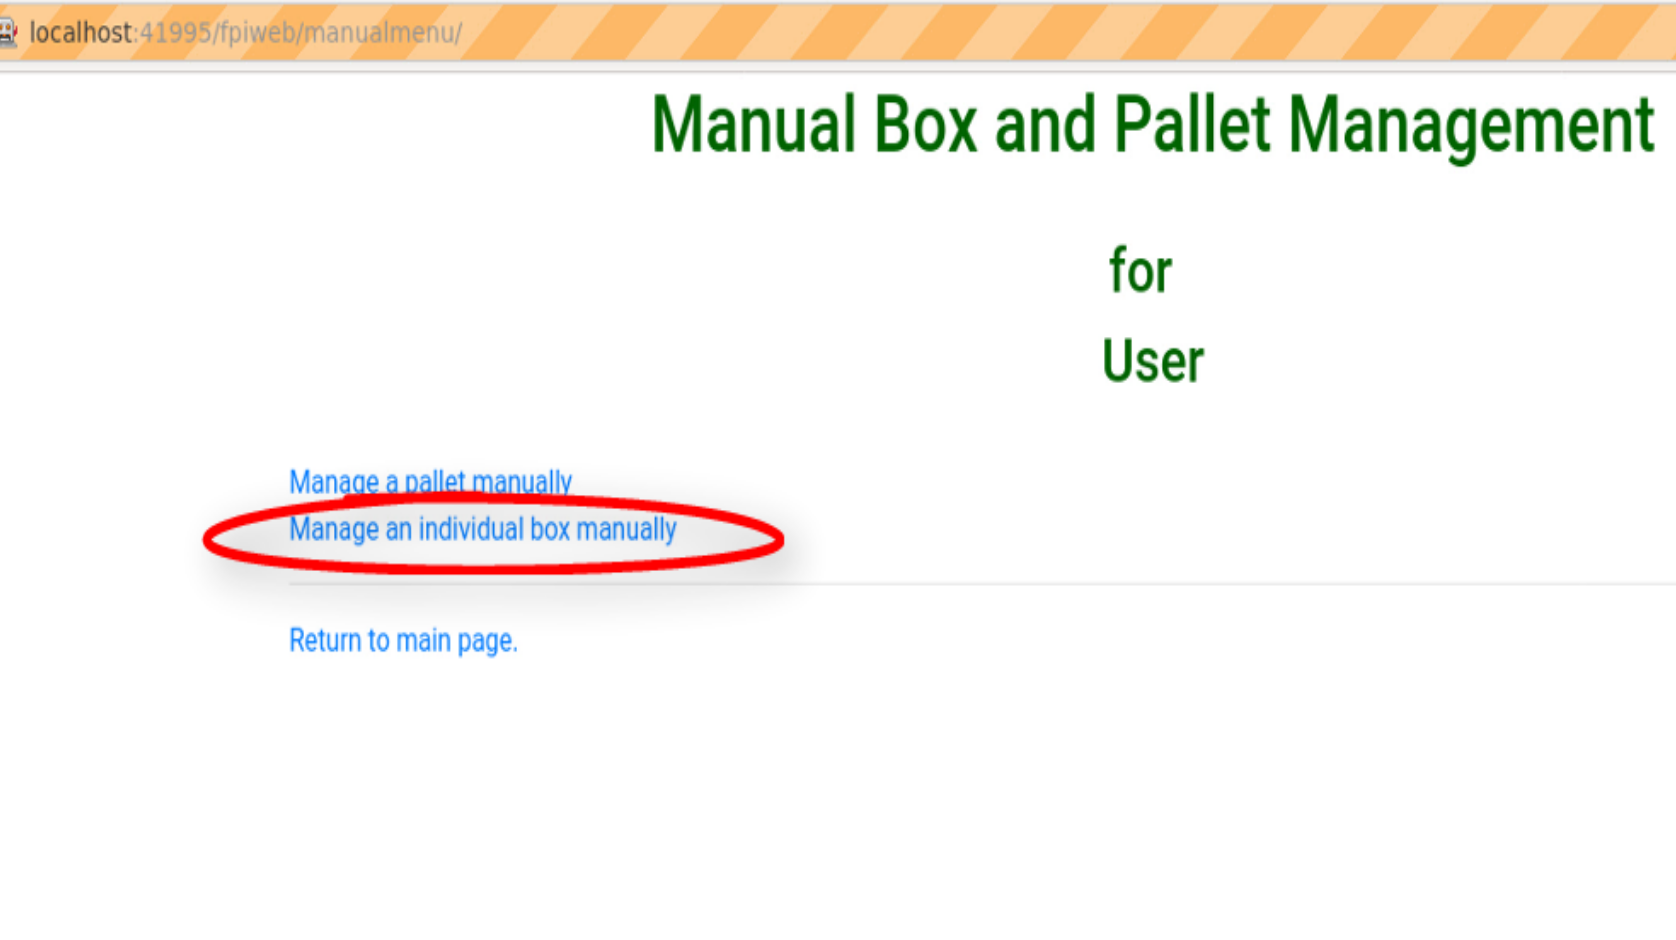
To manage individual boxes of product click on the Manage an individual box manually link as shown below.
1.2.2. Manual Pallet Management Screens
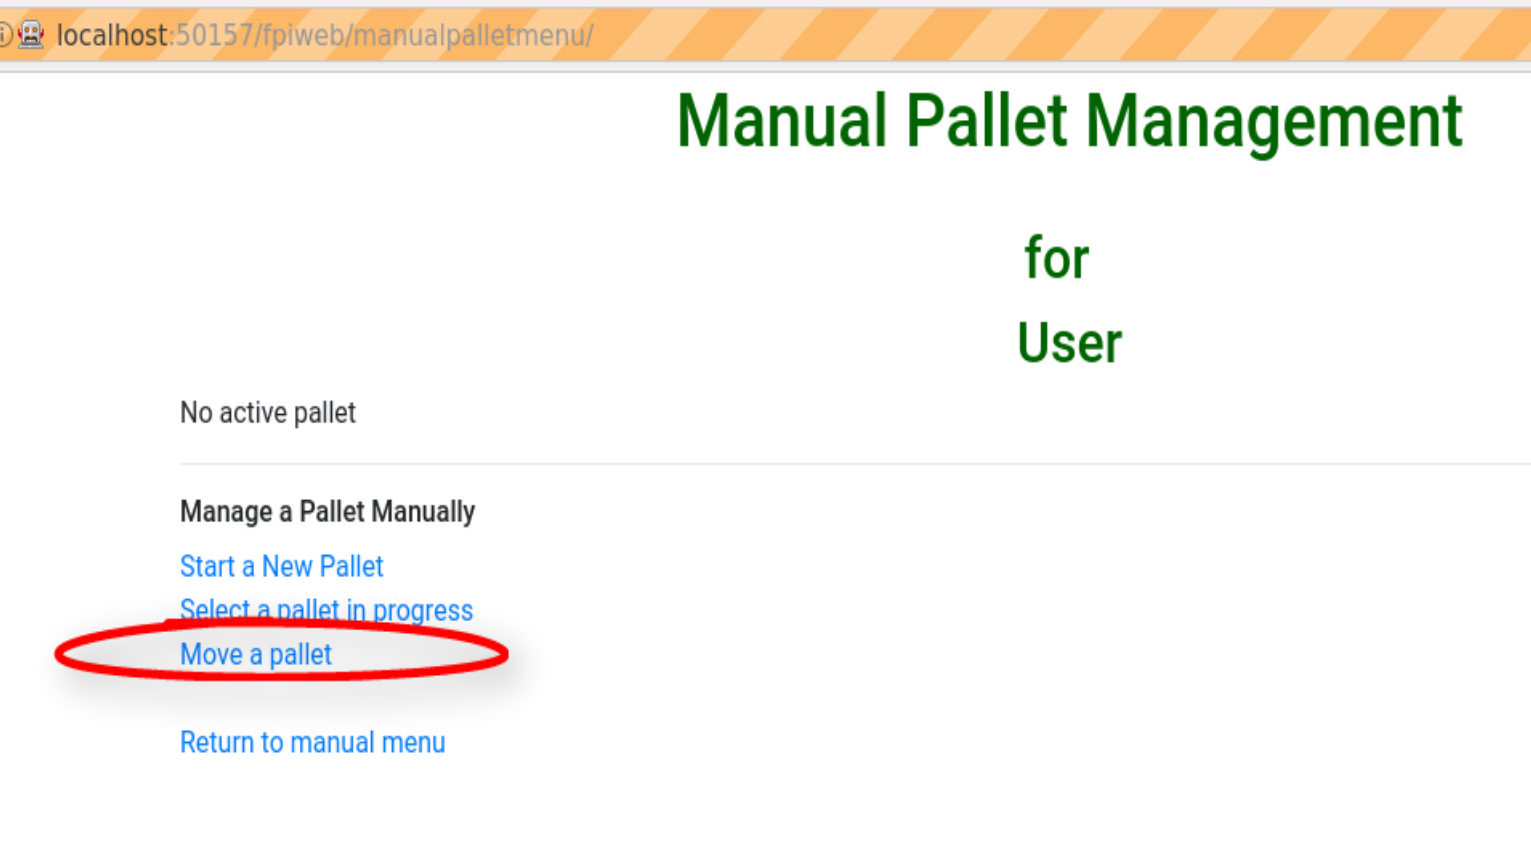
If you clicked on the Manage a pallet manuallyy link you should be directed to the Manual Pallet Management screen. Here you will see 3 menu items.
Start a New Pallet
Select a pallet in progress
Move a pallet
Currently the only link that is working is the Move a pallet link. To change the location of a pallet click on Move a pallet as shown below.
Move a Pallet Screens
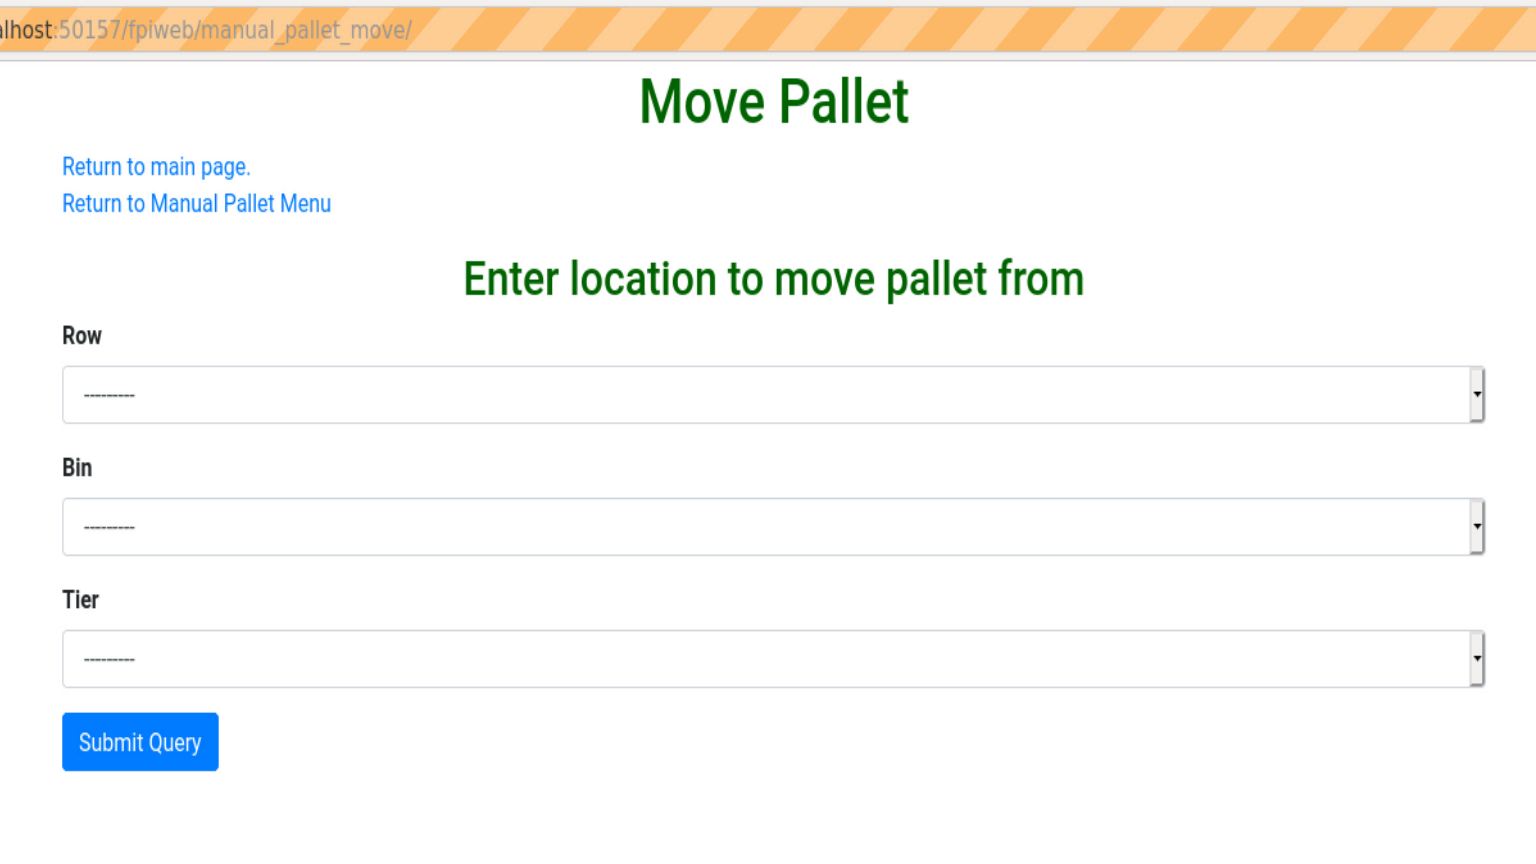
After clicking on Move a pallet you should see a screen like the one below. This screen allows you to move the location of each pallet along with its boxes in the database records. Basically if you move a pallet you are also moving the boxes the pallet contains.
When moving a pallet (with its boxes) three different conditions can occur.
Move a pallet and its boxes to an empty pallet location.
Move a pallet and its boxes to non-empty pallet location.
Attempt to move an empty pallet with no boxes.
All three conditions will be shown below.
Move a Pallet to an Empty Pallet Location
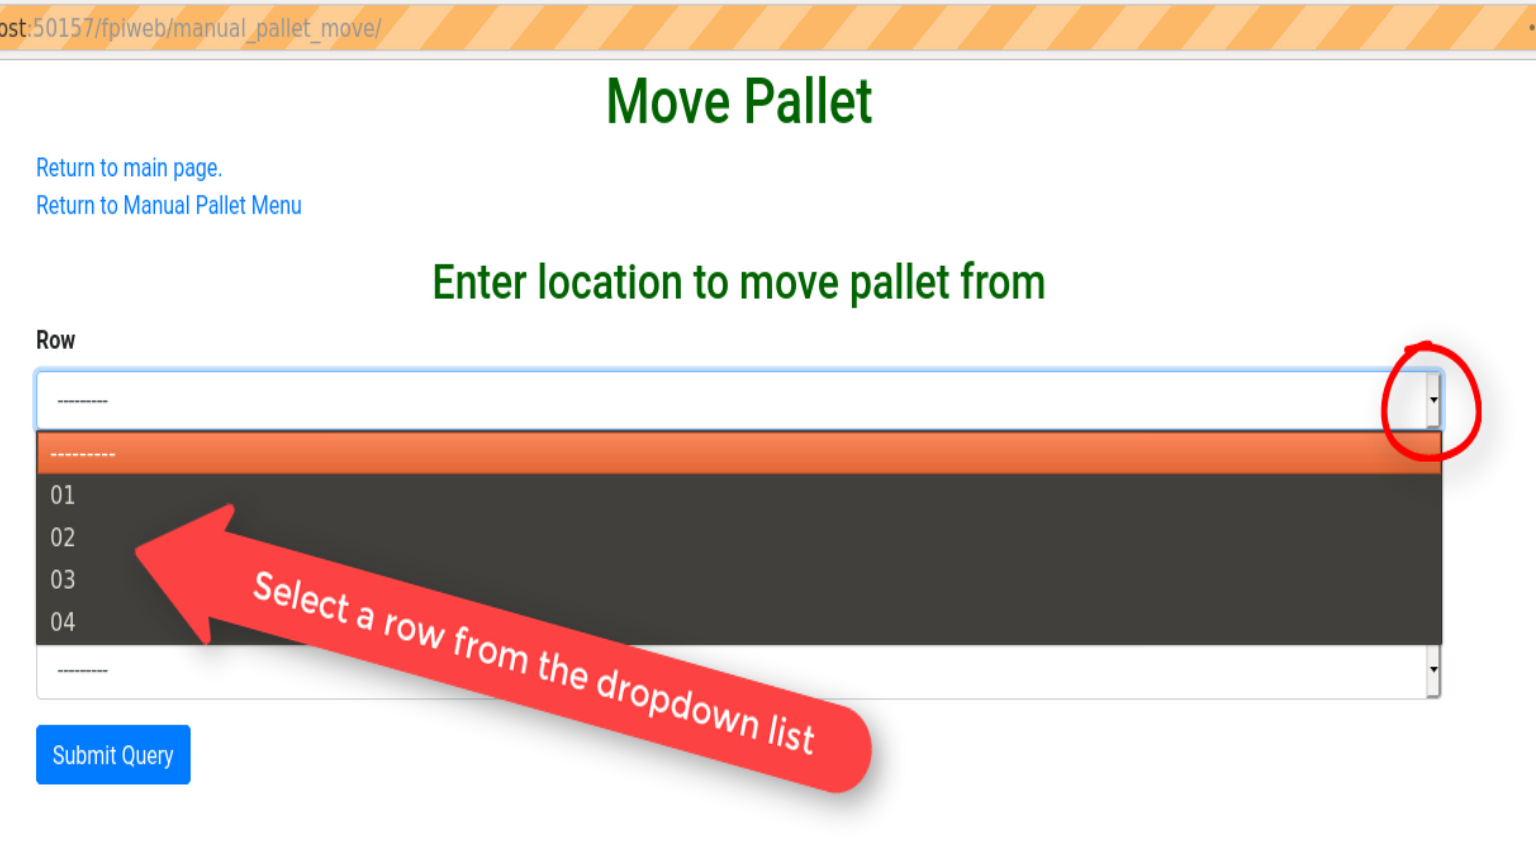
When moving a pallet and its boxes to a new location the first thing you need to do is to “Enter location to move pallet from”. You enter the position of the pallet by selecting the Row, Bin, and Tier dropdown lists by using the mouse to click on the down arrow at the right of each dropdown list. Selecting the down arrow as shown below in the Row dropdown list brings a set of choices. Simply click on the current Row location choice to “Enter the location to move pallet from”.
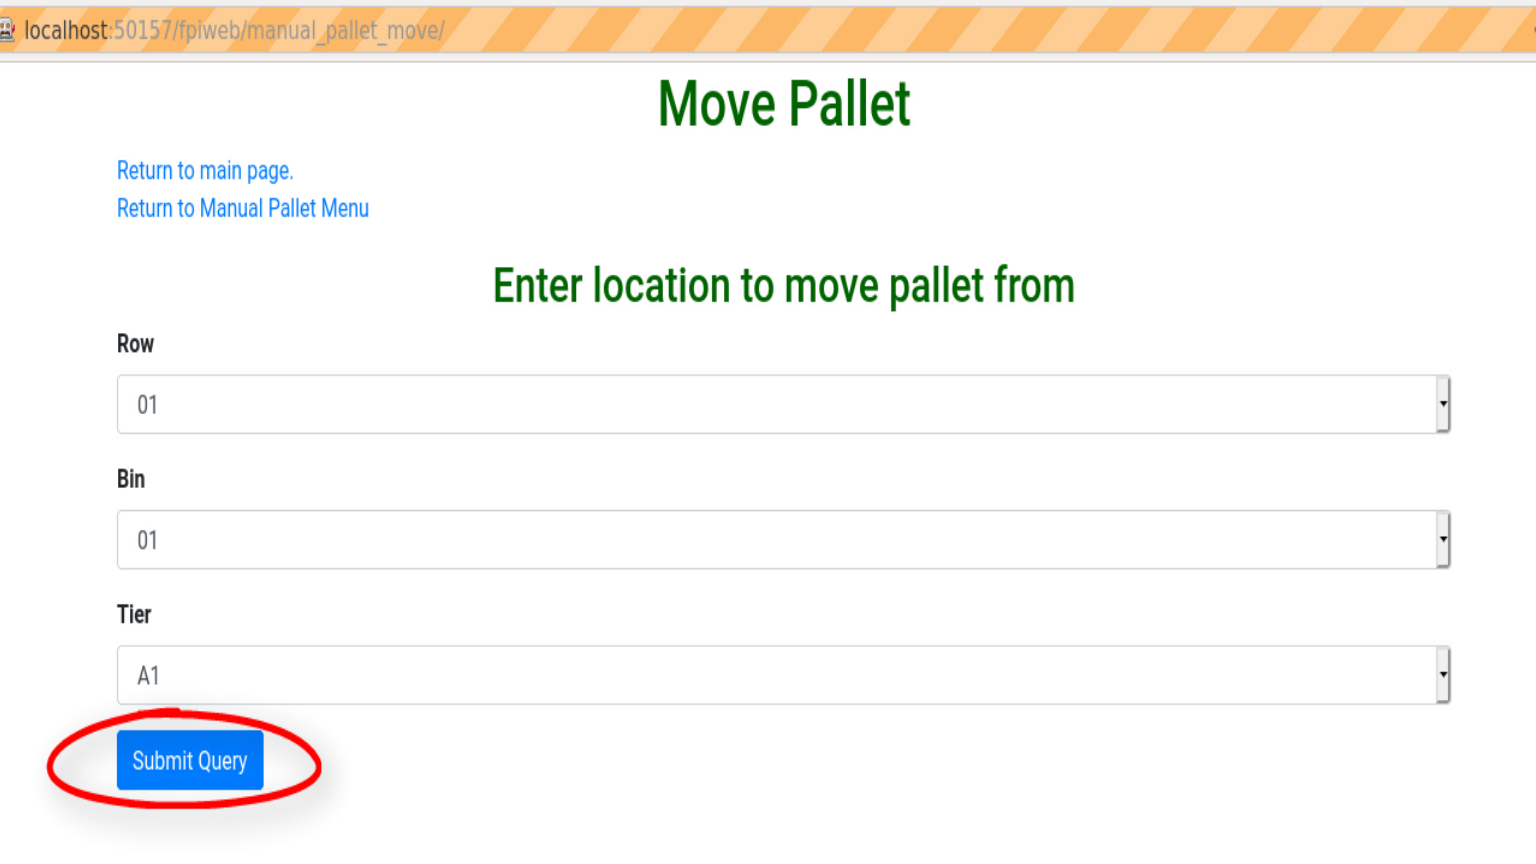
Do the same with the Row and Tier locations. Once that is done you should see the Move Pallet screen as filled out below with Row, Bin, and Tier locations filled out. Then click on the blue Submit Query button.
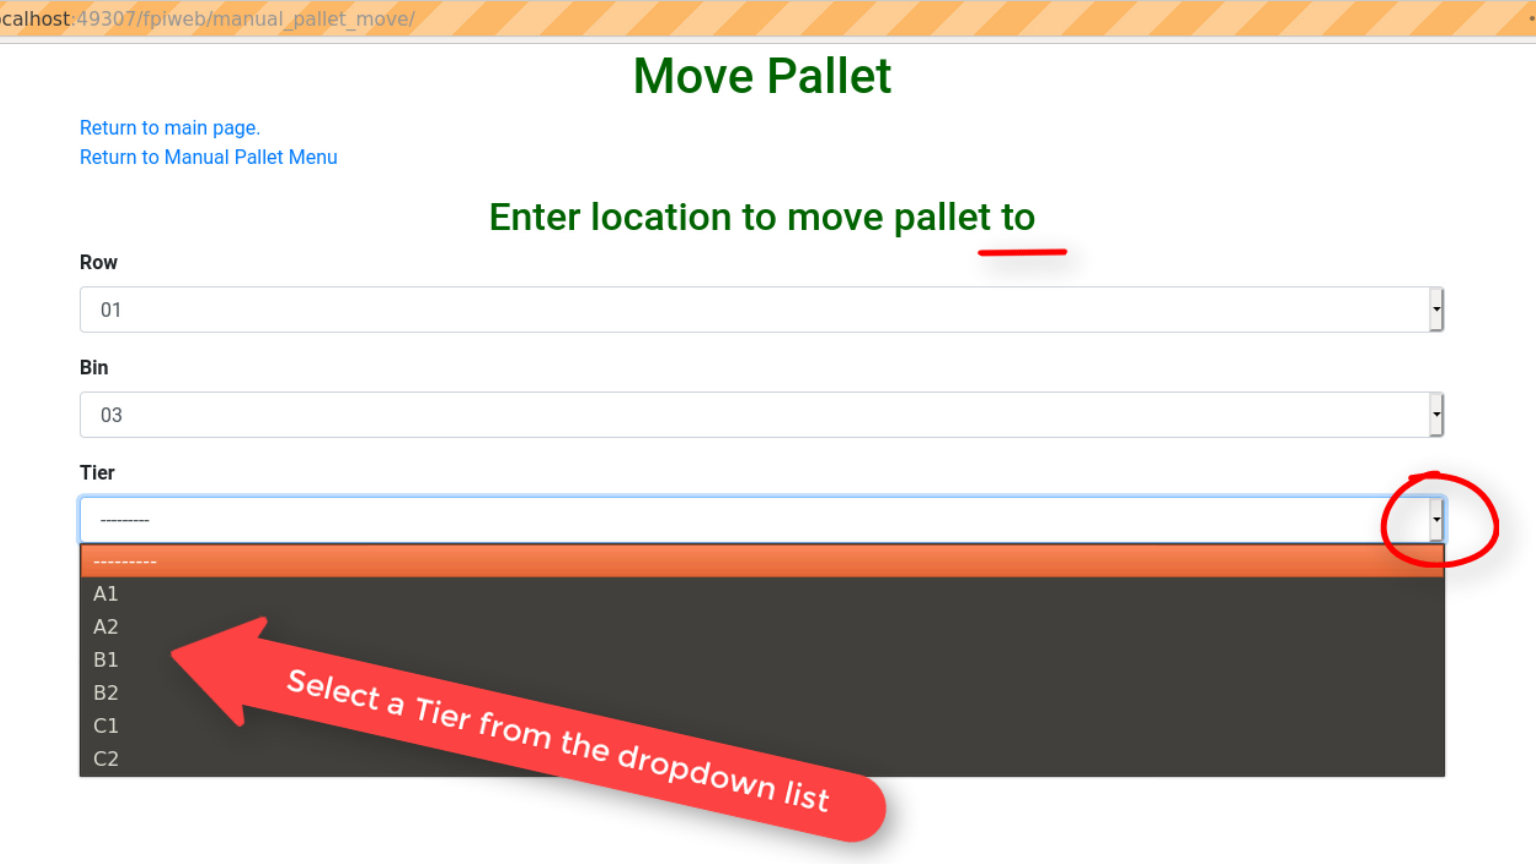
This will bring you to a similar screen but this new screen will say “Enter location to move pallet to”. Enter the Row, Bin, and Tier location for where the pallet and it’s boxes will be moved to. The screen below shows the new Tier location being chosen.
Once the Enter location to move pallet to screen has been filled out click on the blue Submit Query button. If the new location you want to move the pallet is empty and has no boxes you should see a screen similar to the one shown immediately below.
If the “Enter location to move pallet to” is NOT EMPTY then you will see a screen like the one shown in the next section below.
Move a Pallet and Its Boxes to a Non-Empty Pallet Location
The screen below shows up when you try to move a pallet to a location where a pallet is already located. Notice that the message states “There are 2 boxes at 01,03,C2”.
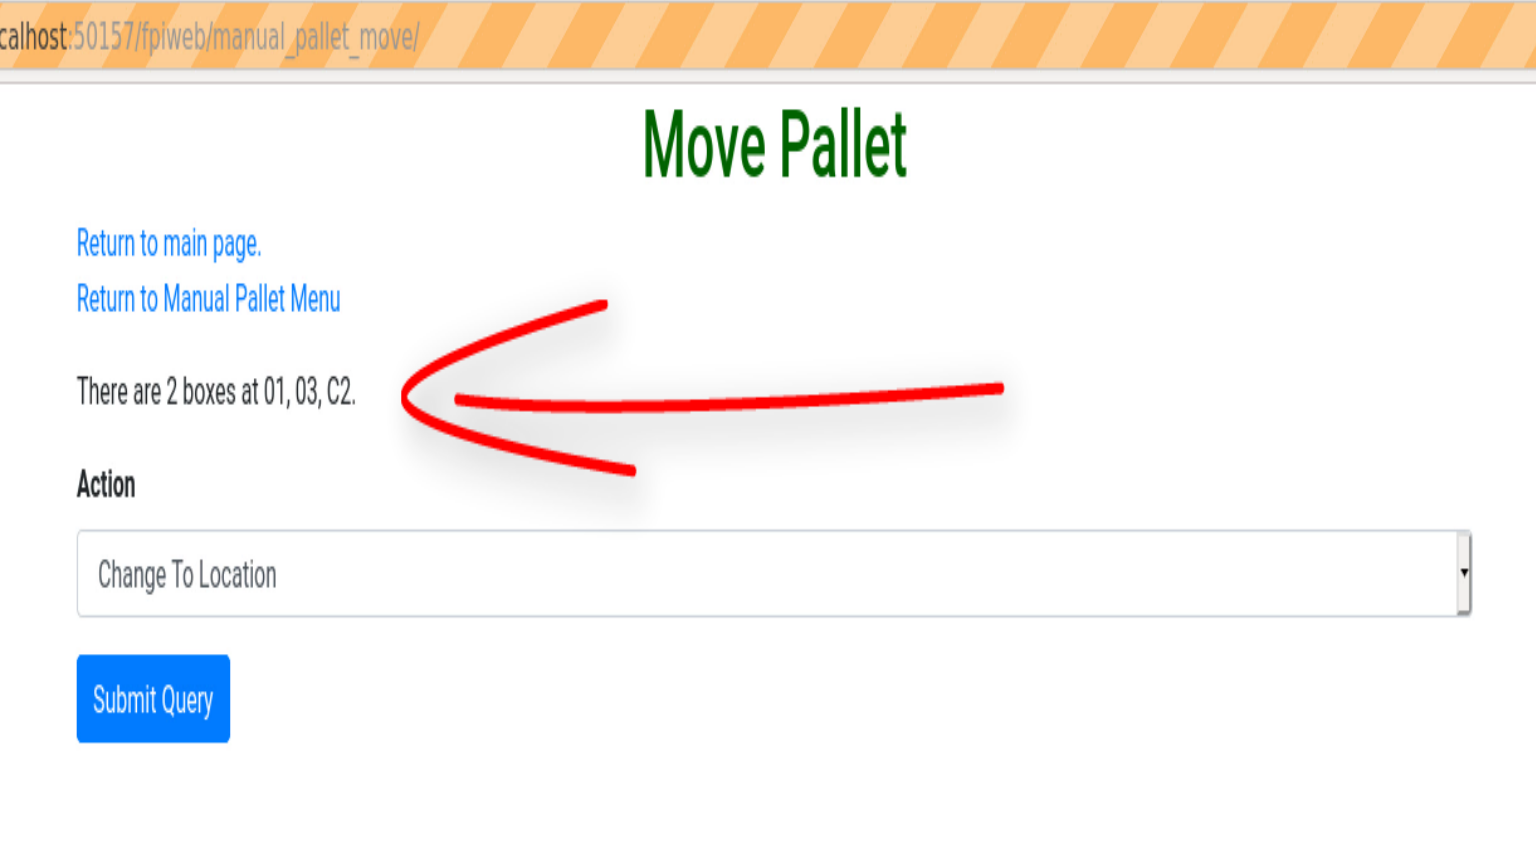
This means you will have to make a decision, either (1) choose a new location by clicking the Change To Location choice or (2) merge the pallets by clicking the Merge Pallets choice.
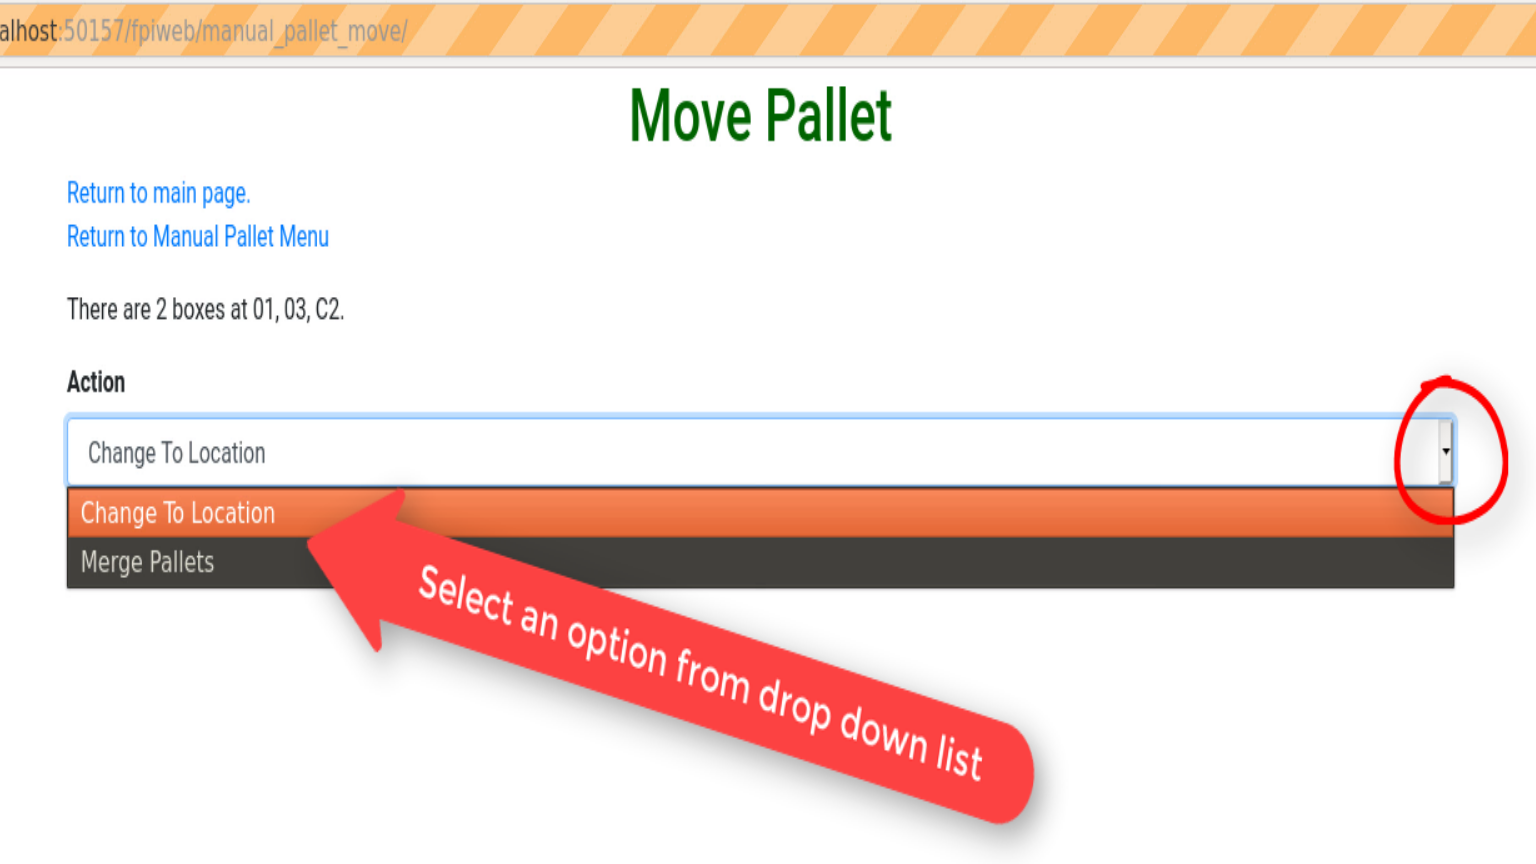
If you click on Change to Location you will be directed back to the Enter location to move pallet to screen as shown above. From there you can select another location to move the pallet to.
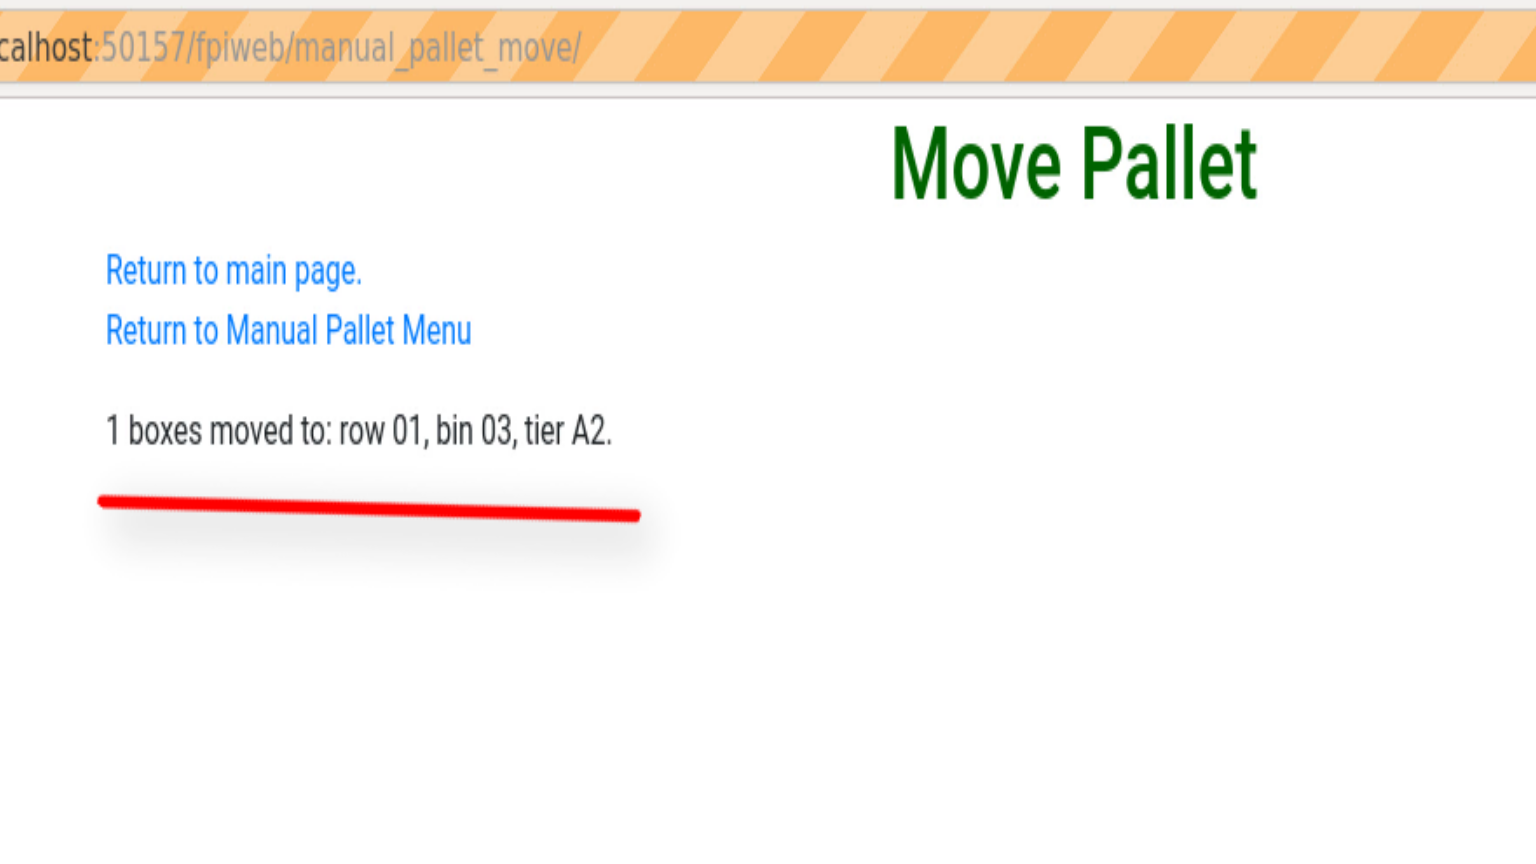
If you click on Merge Pallets both pallets along with their boxes will be merged into the new location you picked from the Enter location to move pallet to screen. You will see a screen stating “boxes move to row, bin, tier”.
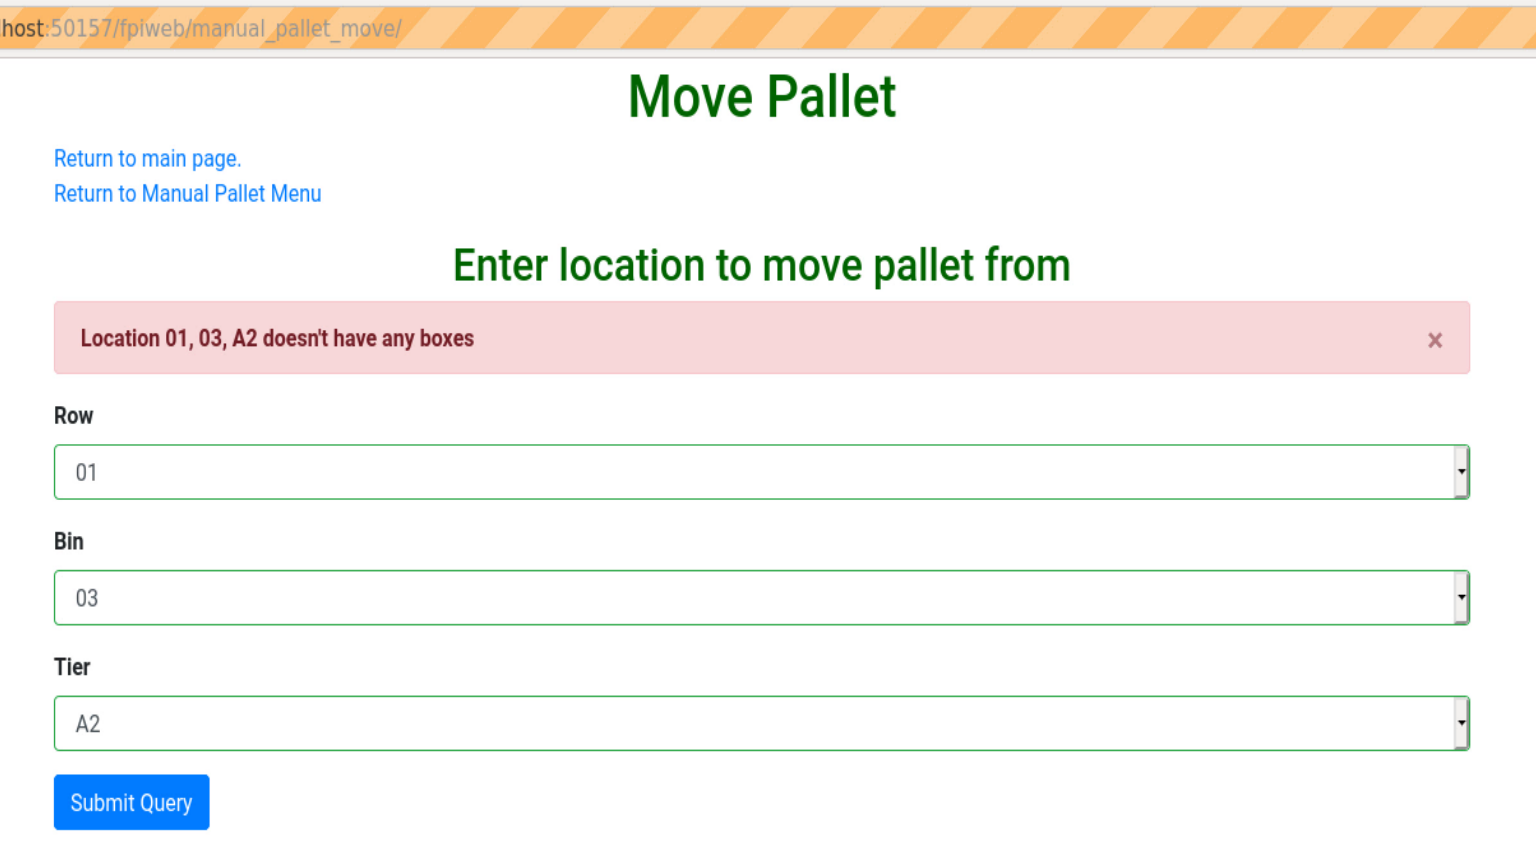
Attempt to Move an Empty Pallet
If you attempt “Enter location to move pallet from” and there are no boxes recorded in the database for that pallet location you will see a screen similar to the one shown below.
1.2.3. Manual Box Management Screens
If you clicked on the Manage an individual box manually link you should be directed to the Manual Box Management screen. Here you will see 5 menu items.
Check the status of a box
Add a new box to inventory
Checkin a new box
Checkout (consume product in) a box
Move a box
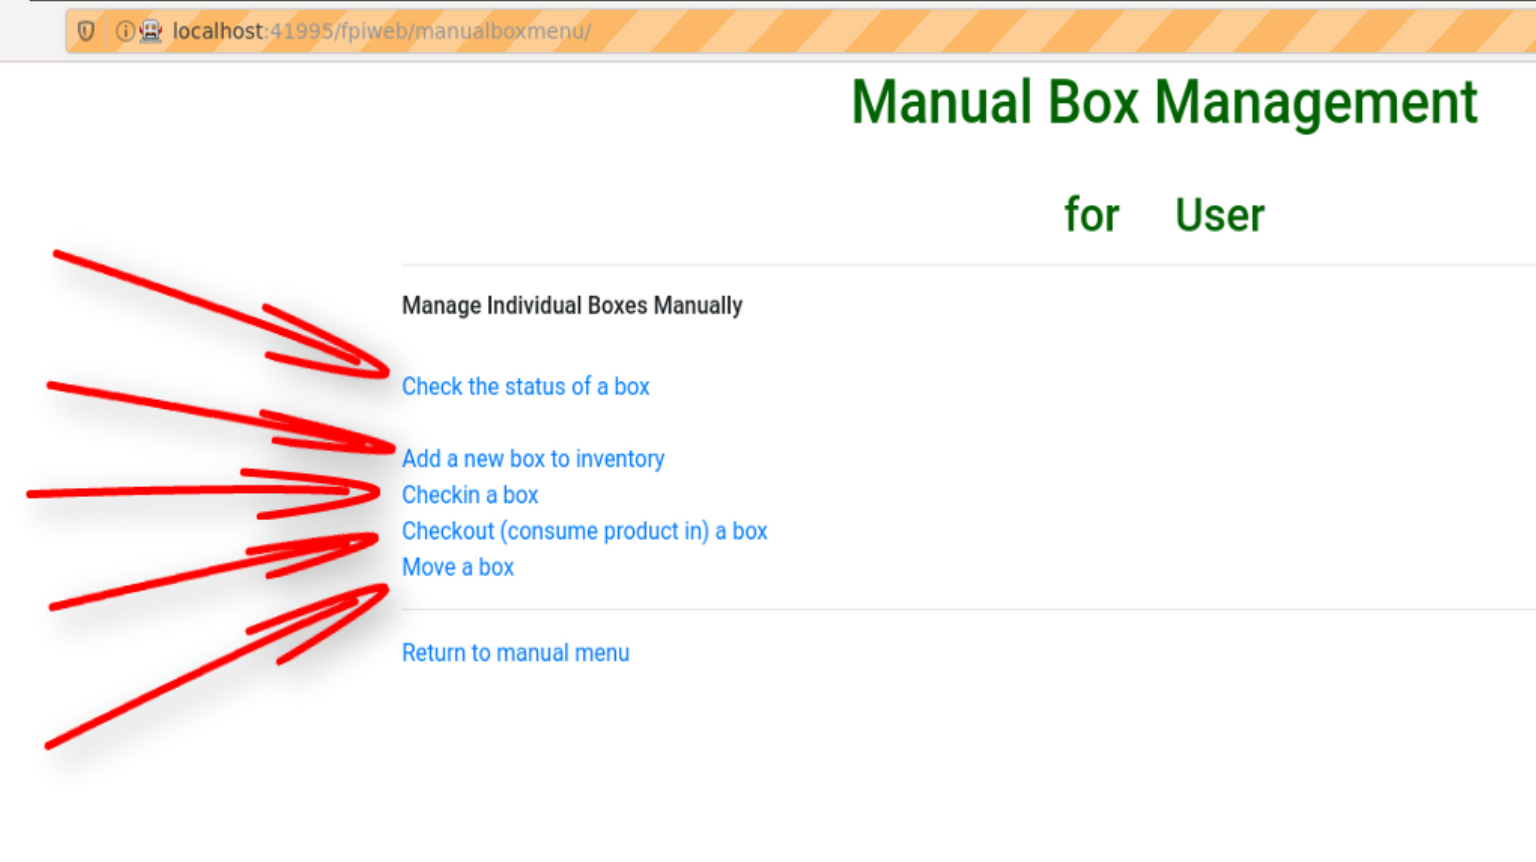
Of course you can also Return to manual menu. Each of the 5 menu items will be discussed below.
Manual Status a Box Screen
From Manual Box Management clicking on Check the status of a box will bring you to the Manual Status a Box screen. Here you can check th box status by entering a 5 digit box number and then clicking on the Search button.
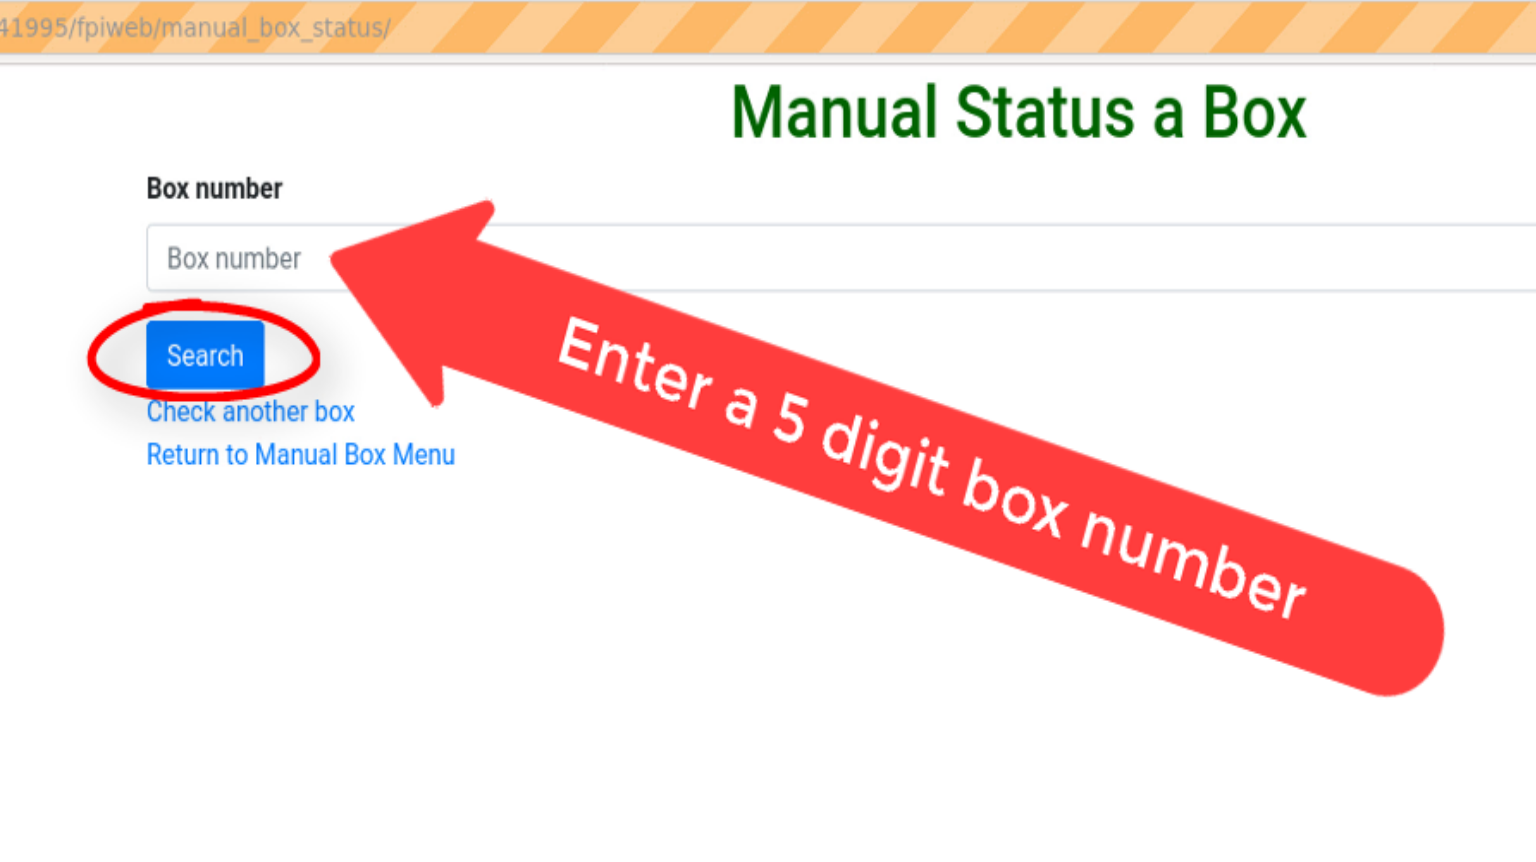
After clicking on the Search button you should see a screen listing the Box Number, Box Type, Box Contents, Contents Expire (expiration date) and location- Row, Bin and Tier number.

From this screen you can click on Check another box or Return to Manual Box Menu.
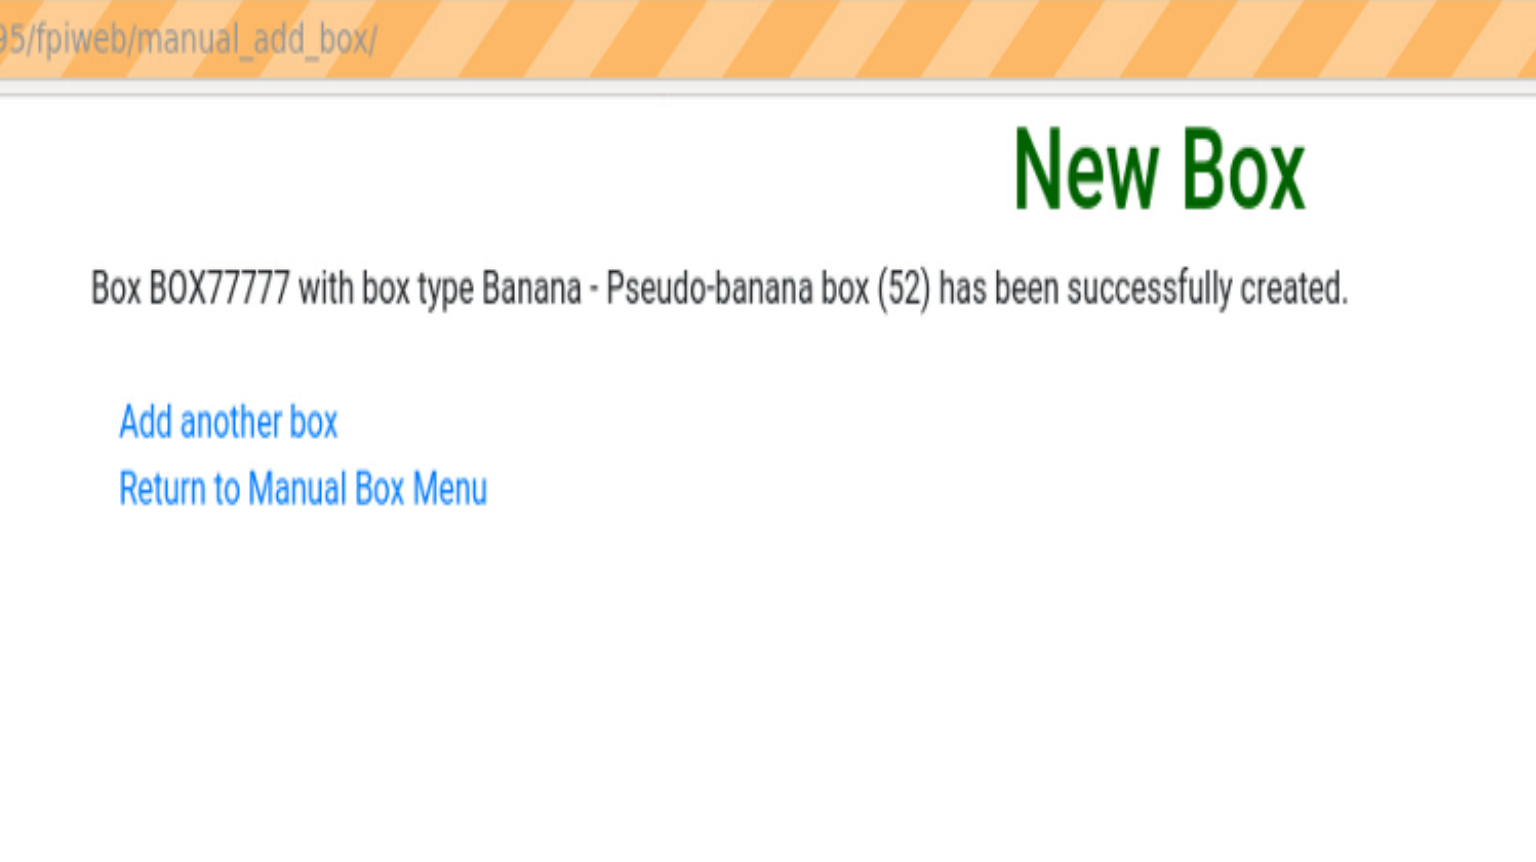
New Box Screen
With this screen you can add a new box following the 4 steps listed below.
Enter a 5 digit box number.
Click on the drop down list triangle at the far right.
Choose an item from the drop down list.
Finally click on the Add Box button (hidden from view in the below graphic).

After clicking on Add Box you should see the following screen. From there you can Add another box or Return to Manual Box Menu by clicking on the links in the New Box screen.
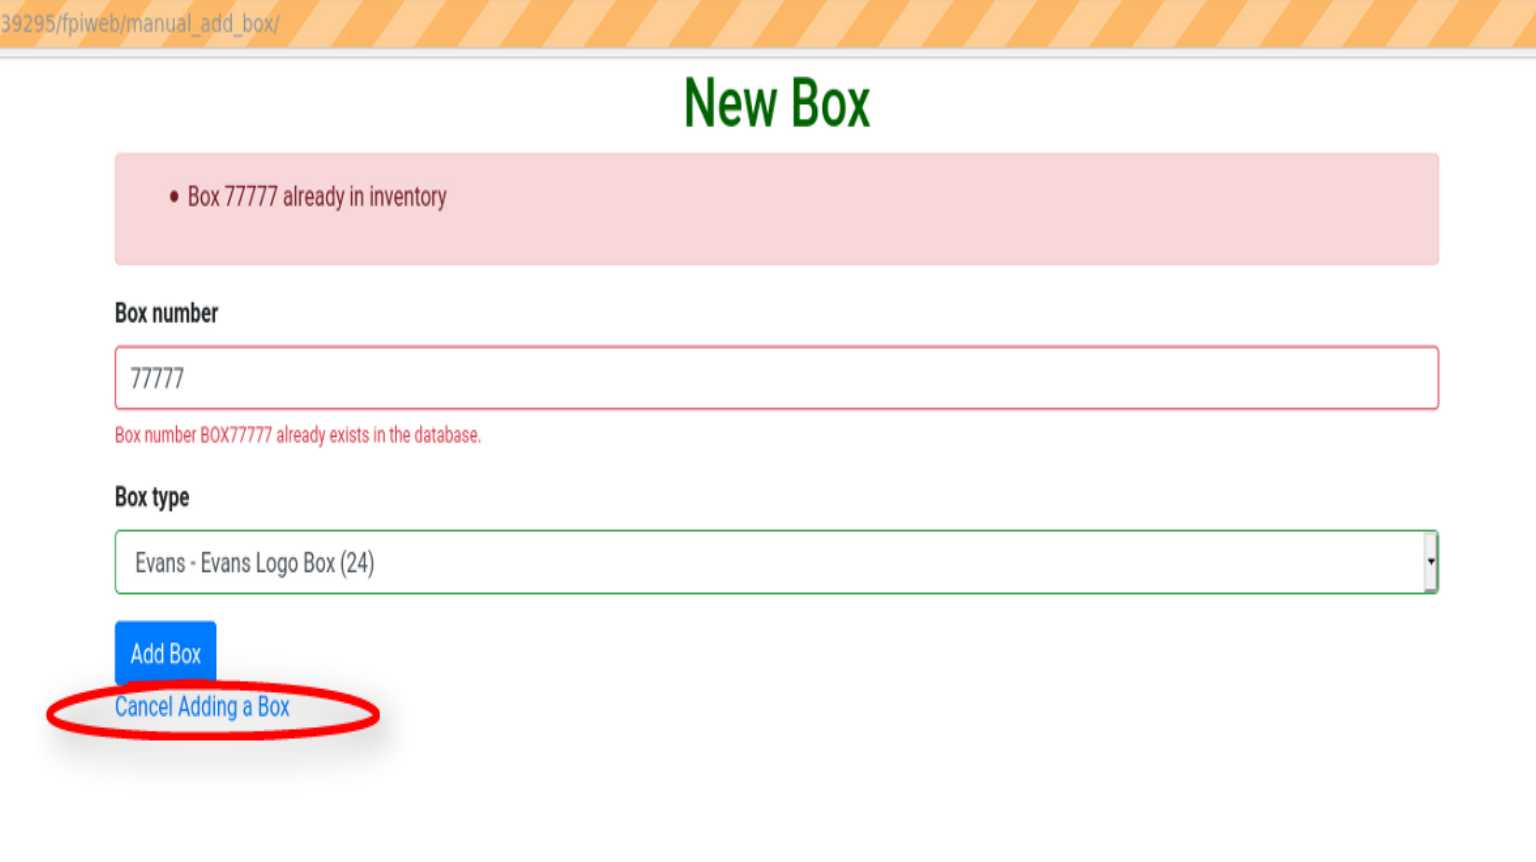
If there was an error you will see the following screen. Simply click on Cancel Adding a Box to return to the Manual Box Management screen.
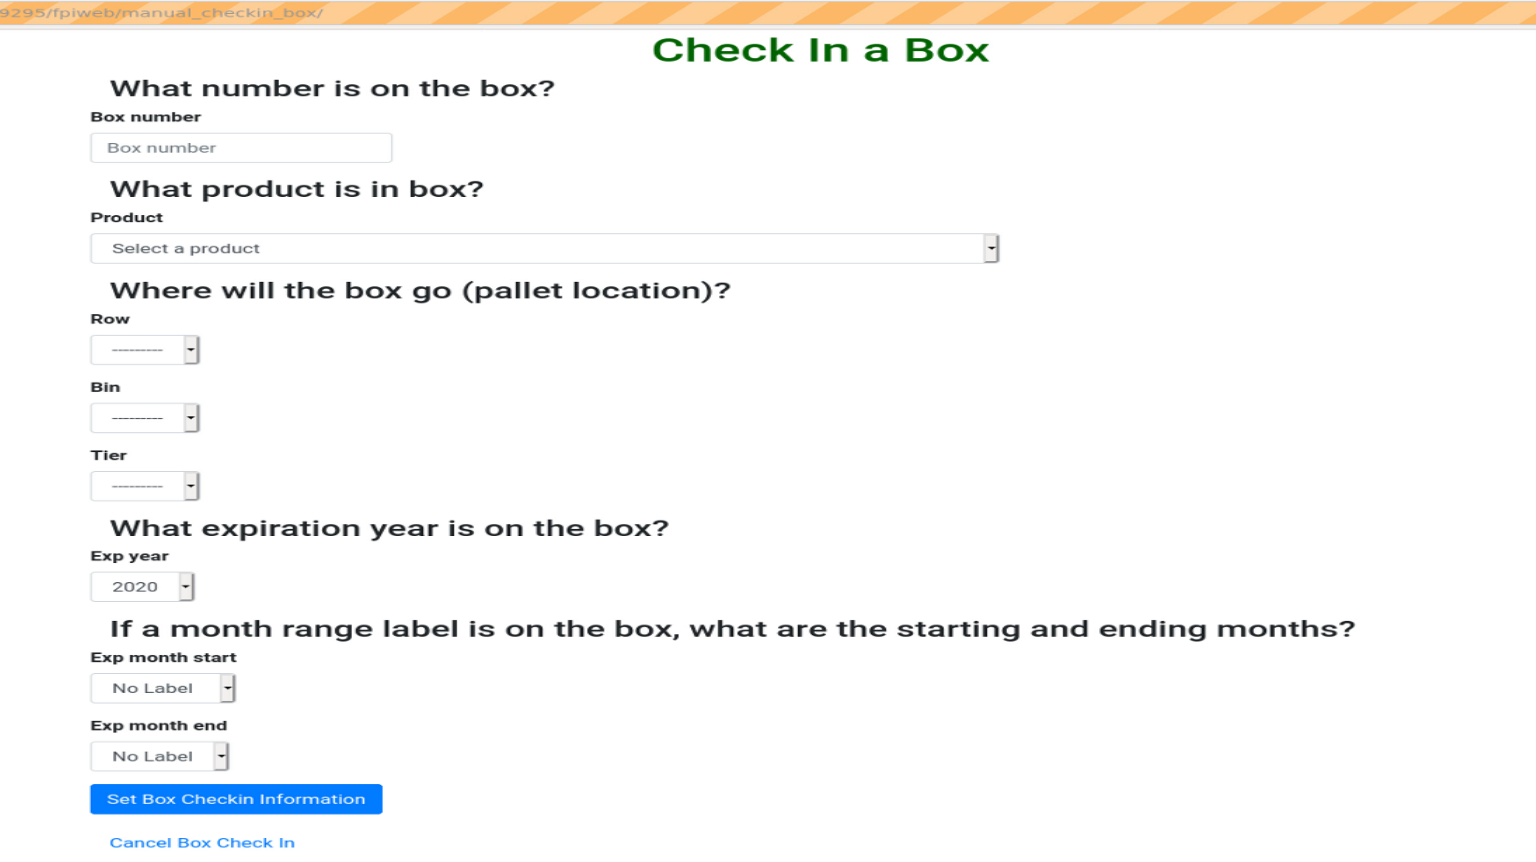
Checkin a Box Screen
With this screen you can add all the information needed to check in a box of food items to warehouse inventory. The blank Checkin Box screen is shown below.
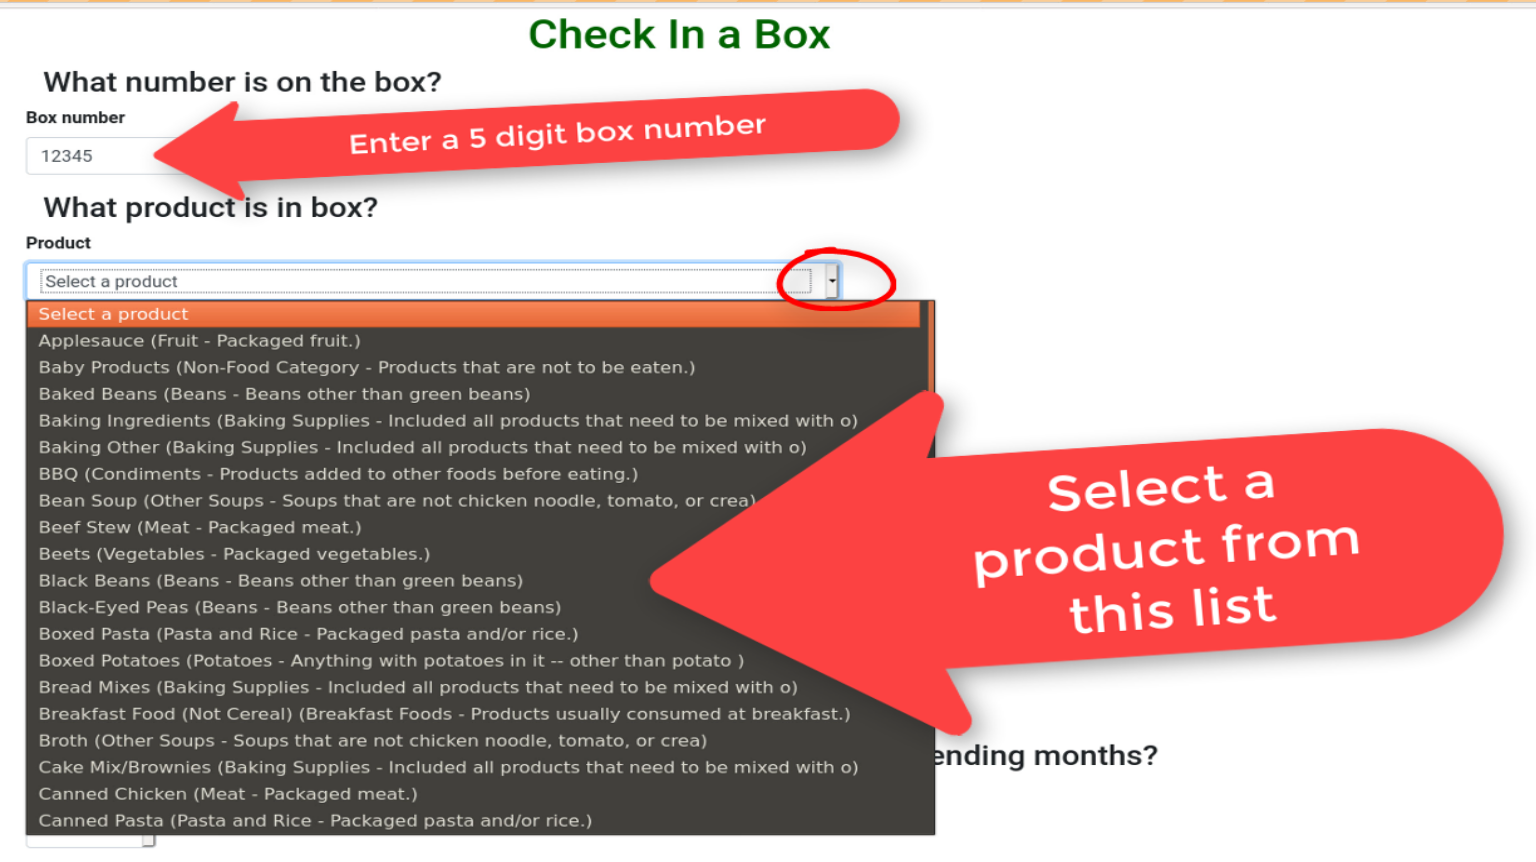
The first two items to enter are the Box number and Product. With the keyboard enter a 5 digit ‘Box number’ in the Box number field. Then click on the small triangle int the circle at the right of the Product drop down list to select a product with your mouse.
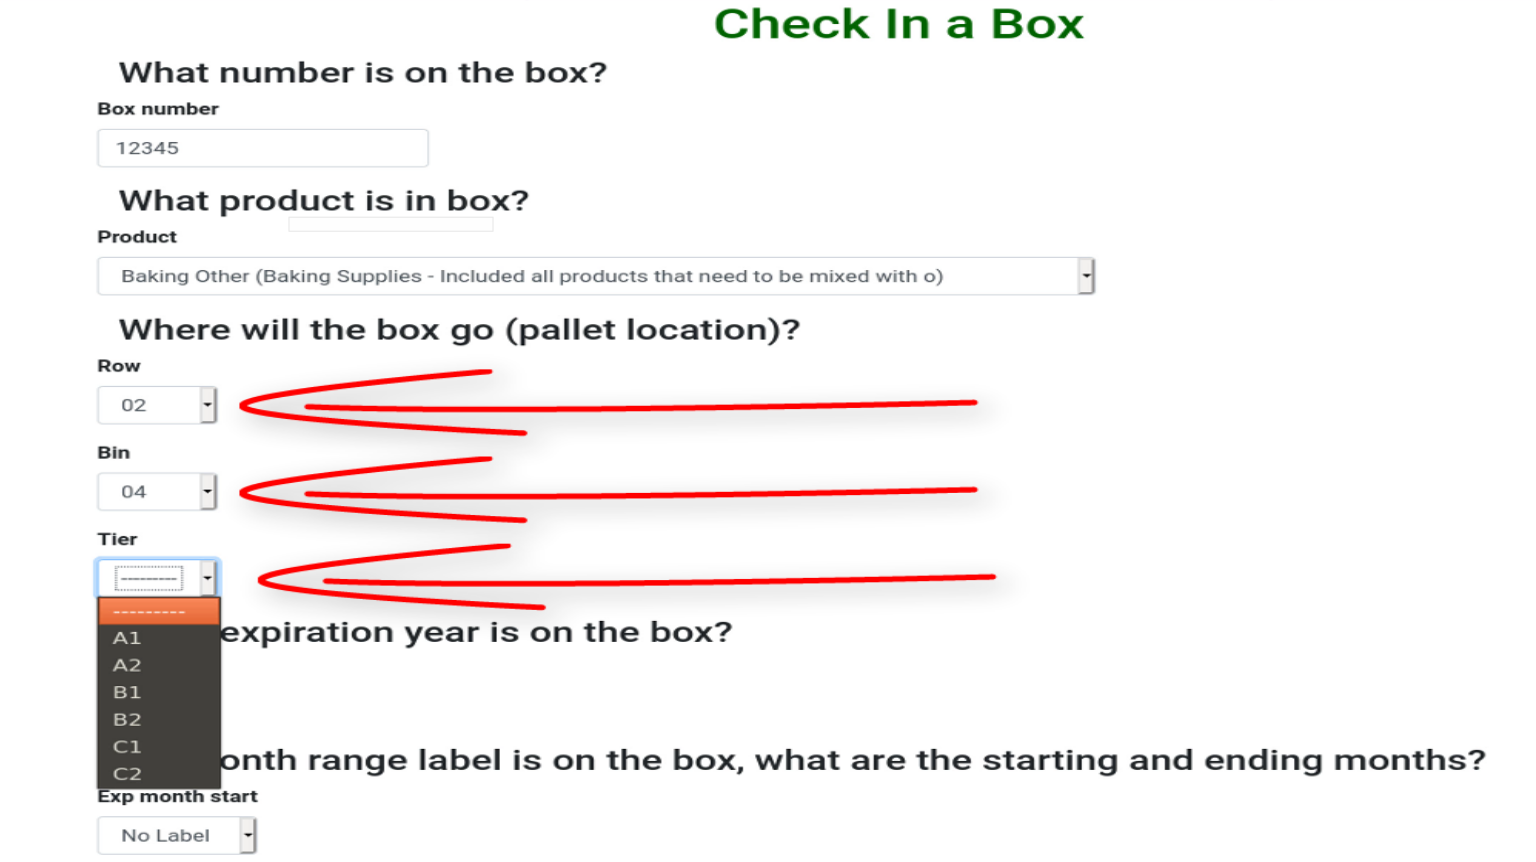
After entering the Product the next step is to enter the pallet location. You will have to select 3 different entries with your mouse.
Row number
Bin number ( Bin number in the length of a row)
Tier number (level up or down
Each entry uses a drop down list and you will make a choice from the drop down list. In the graphic below the Row and Bin numbers have been chosen and the drop down list is shown with the Tier number.
After entering the location enter the expiration year by clicking on the small triangle to the right of the Exp year field and making a selection from the drop down list.
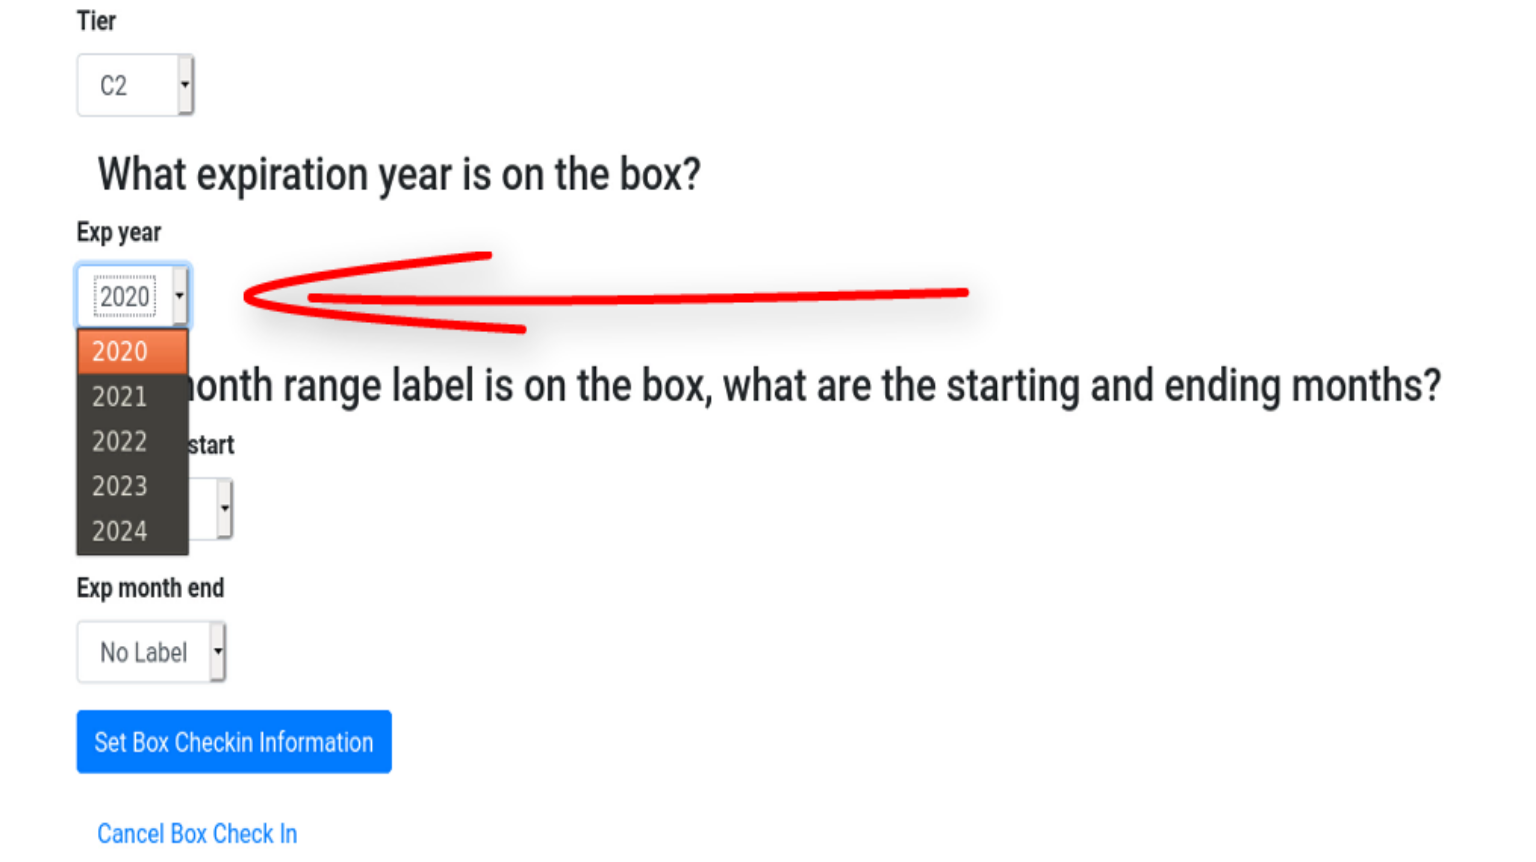
The last selection you will have to make is the expiration month. There are 2 drop down list fields here Exp month start and Exp month end. These fields are optional and it is not necessary to fill these fields out. These drop down lists show a list of all the months in the year. You can also choose to only fill out the Exp month start field also. However if you choose to fill out the Exp month end field you must make sure it is a later month in the year than the Exp month start field. So if you enter April in the Exp month start field, then you must enter May or a later month in the Exp month end field.
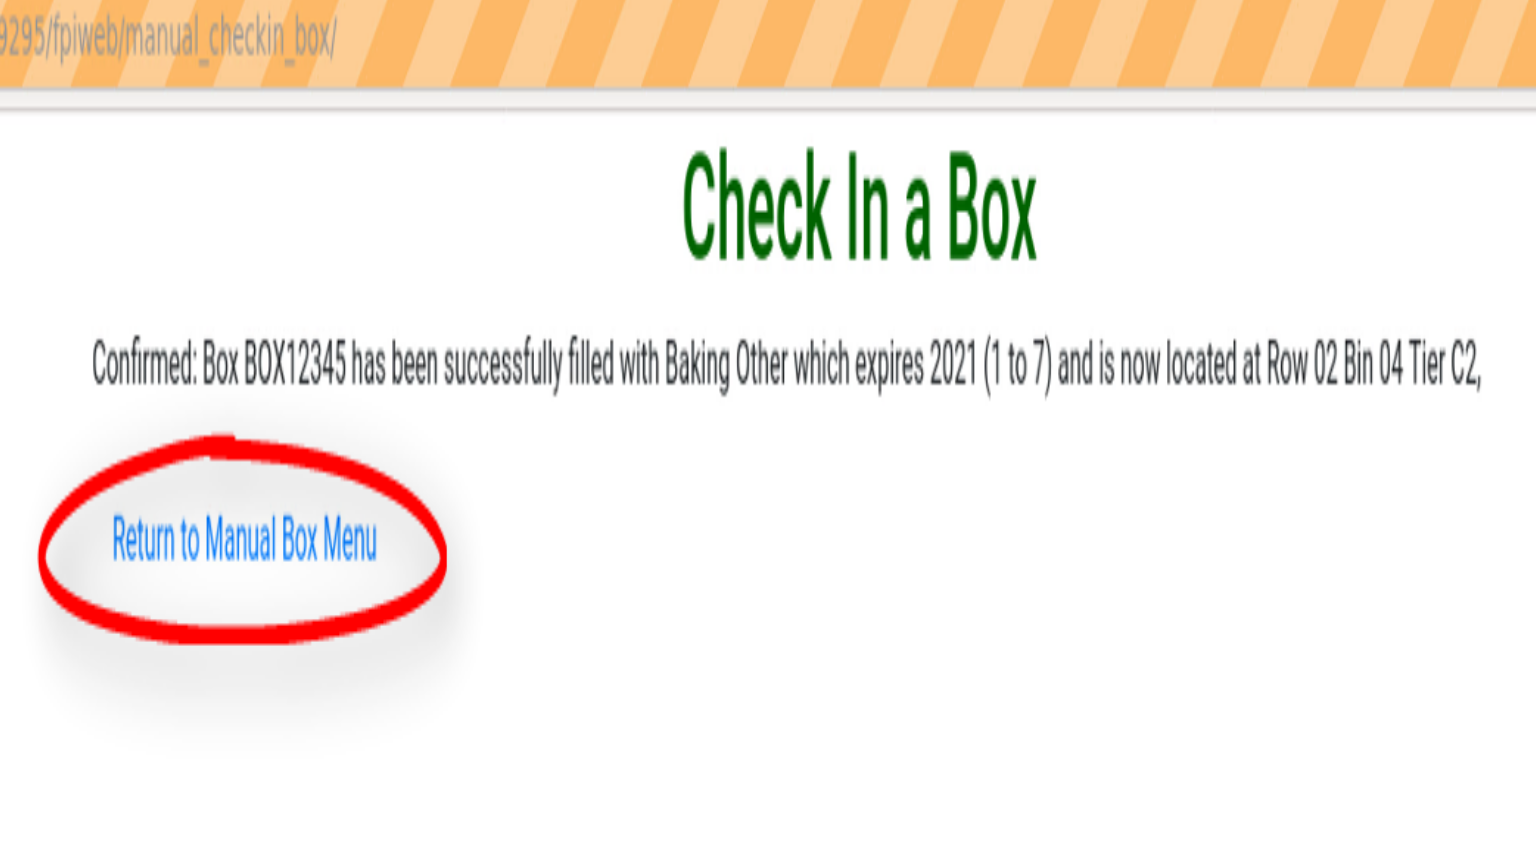
When you are through with the Exp month fields click on the blue Set Box Checkin Information button to enter all the Checkin data.

If everything has worked correctly you should see the following screen below. Simply click on the Return to Manual Box Menu link to continue.
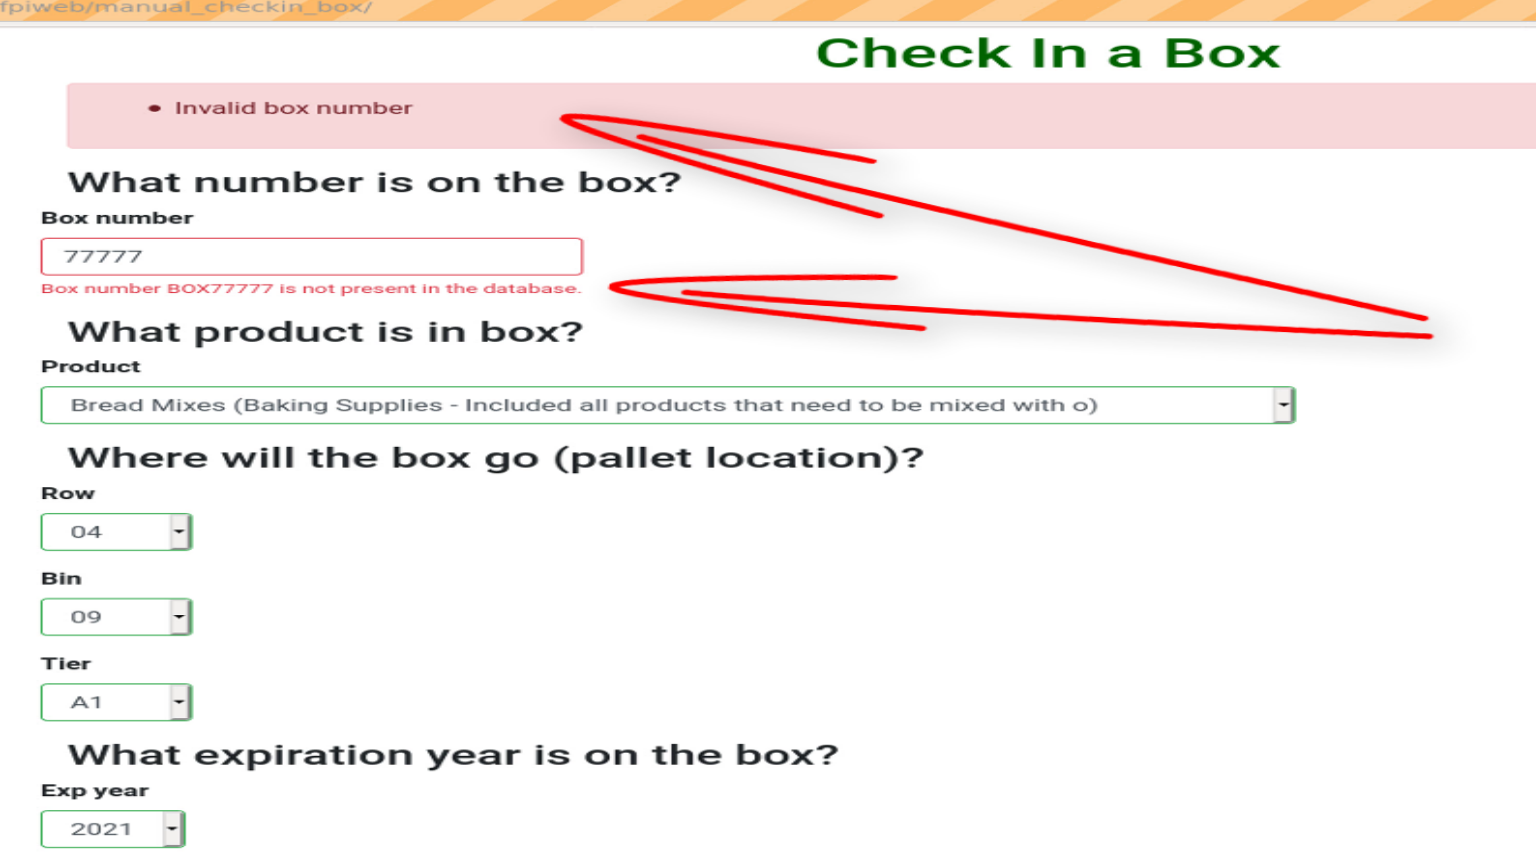
If there is an error you should see a screen like the one below. The red arrows point to what has to be fixed before a box can be Checked in. Click on the Cancel Box Checkin link at the bottom of the page to go back to the Manual Box Management screen to start over.
Consume (Empty) a Box Screen
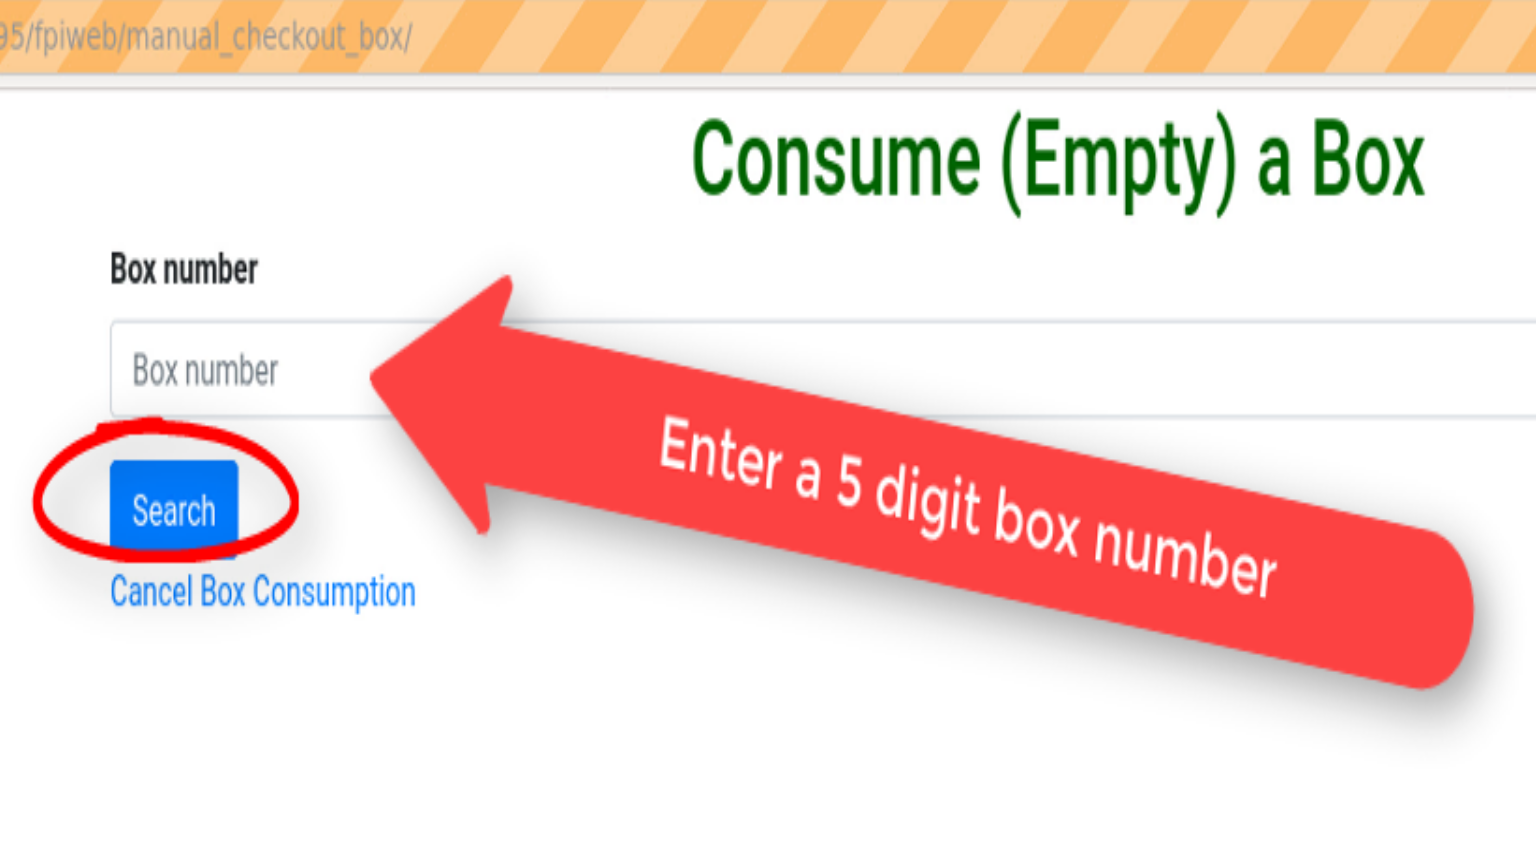
To consume or empty a box enter a 5 digit box number in the Box Number field. Then click on the blue Search button.
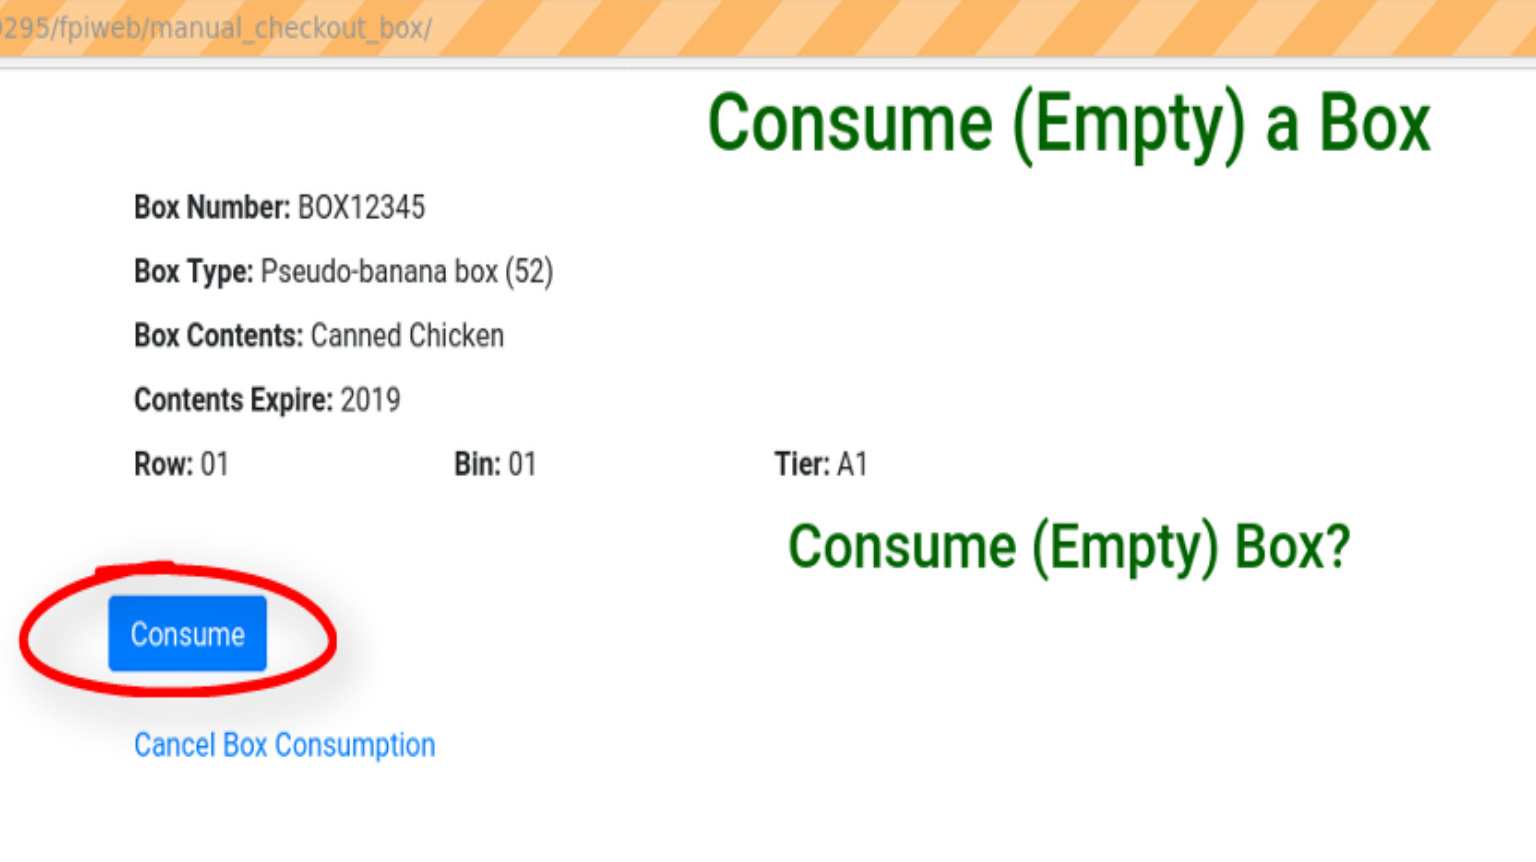
If everything went ok you should see the box information on the next screen. The box information includes the Box Number, the Box Type, the Box Contents, the year the Contents Expire and the location- Row, Bin, Tier. Click on the blue Consume button to continue if all the information seems correct.
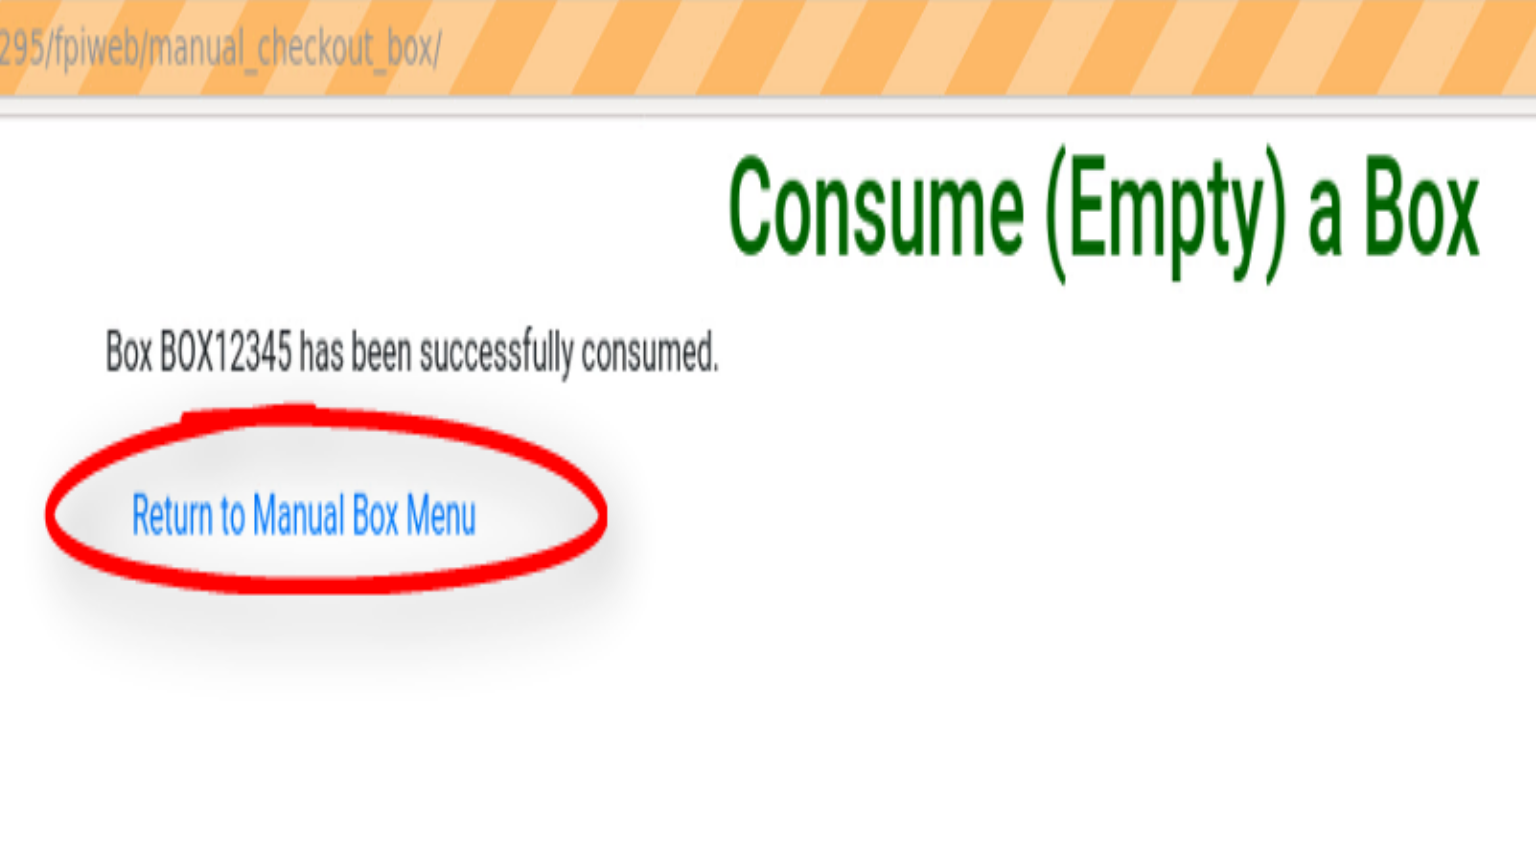
The next screen should contain a message stating that a box ‘has been succesfully consumed’. Click on the Return to Manual Box Menu link to return to the Manual Box Management page.
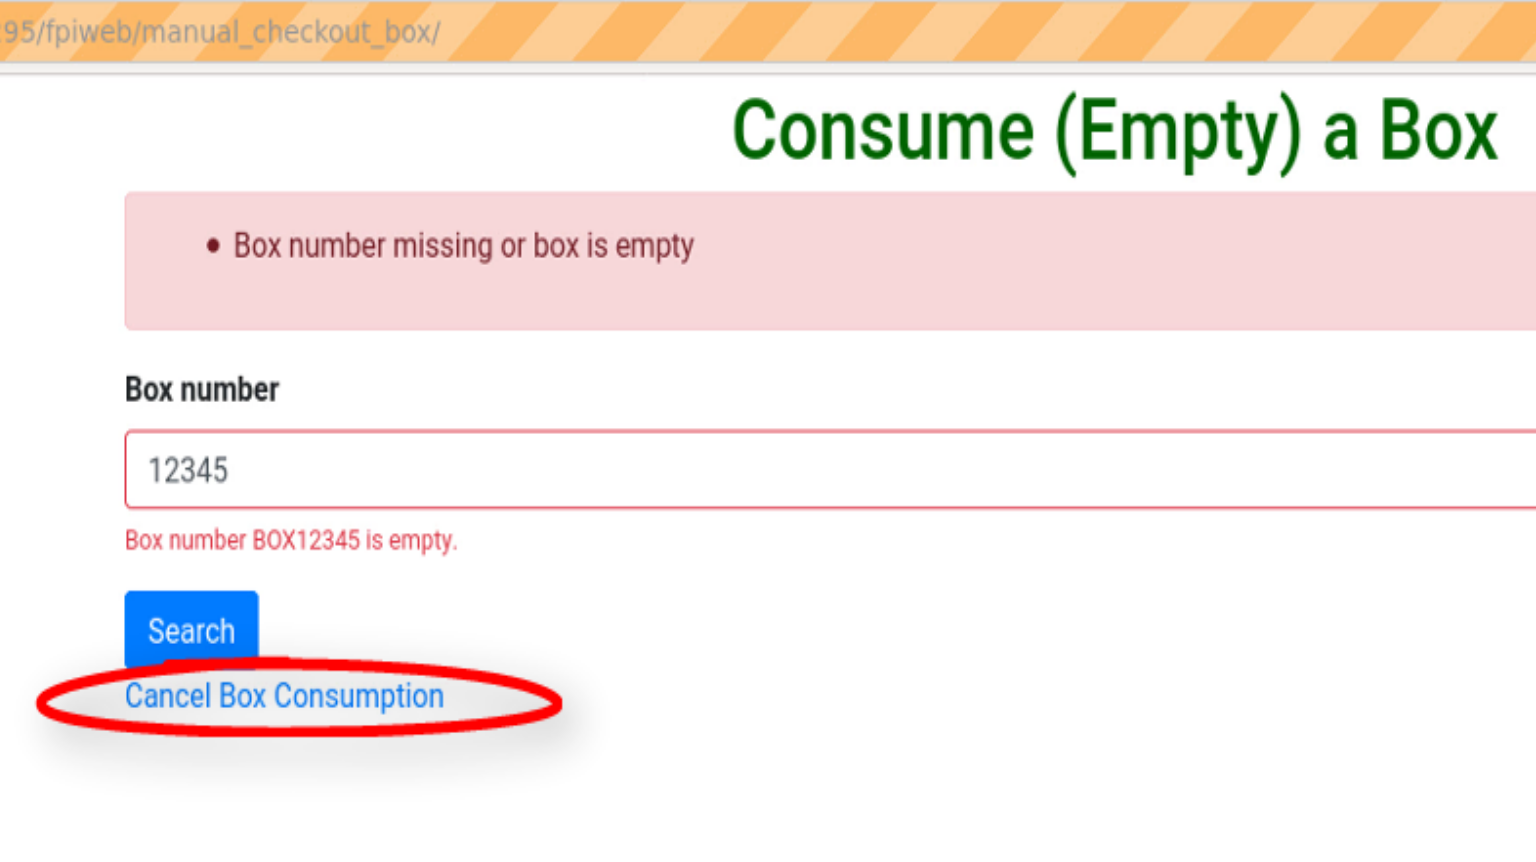
In case of error you should see a screen similar to the one below listing the error. Click on the Cancel Box Consumption link to return to the Manual Box Management page.
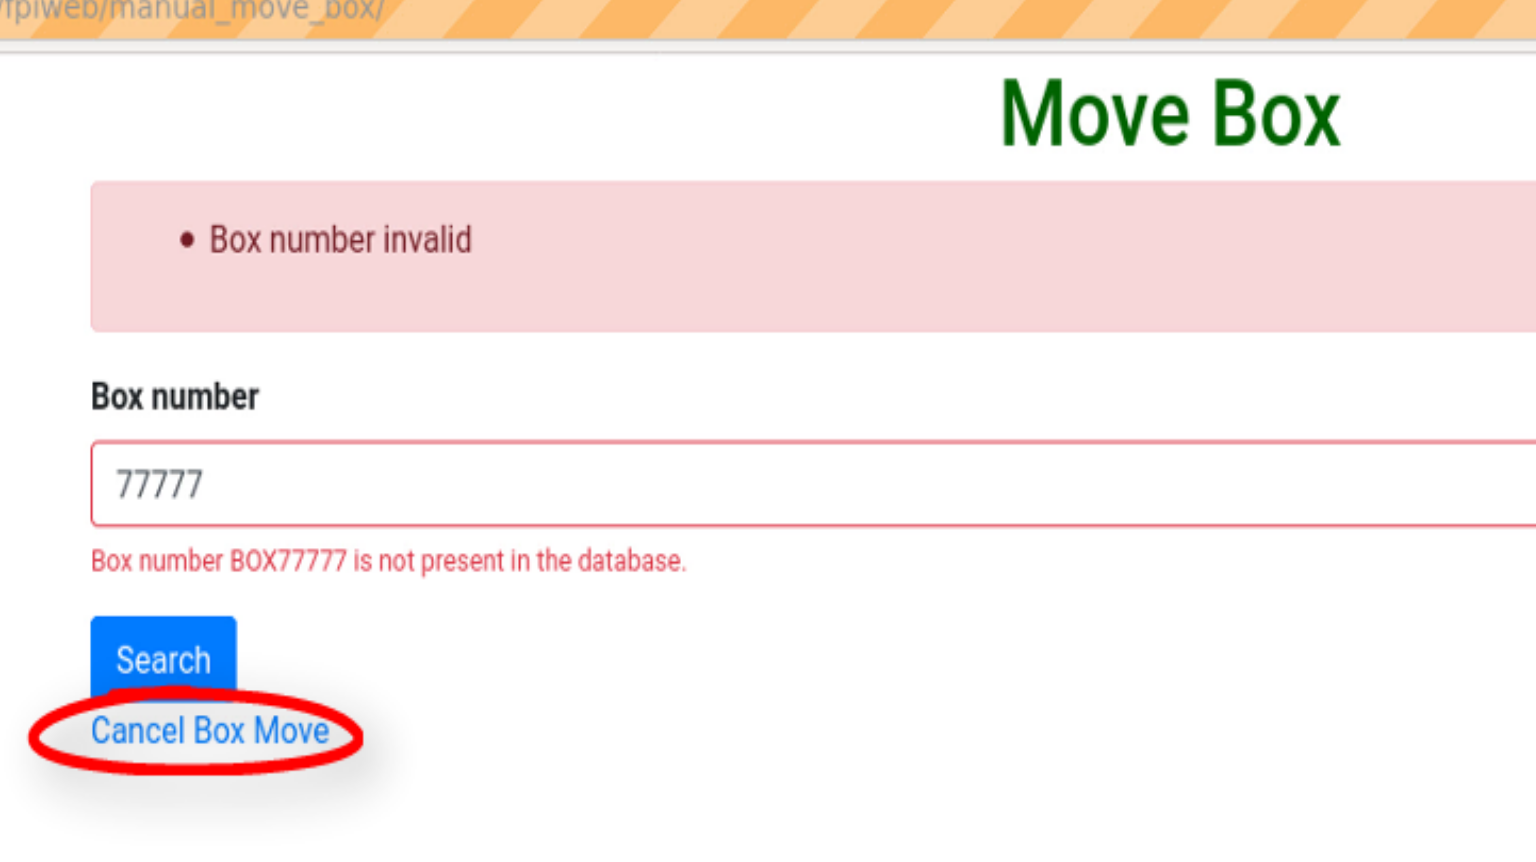
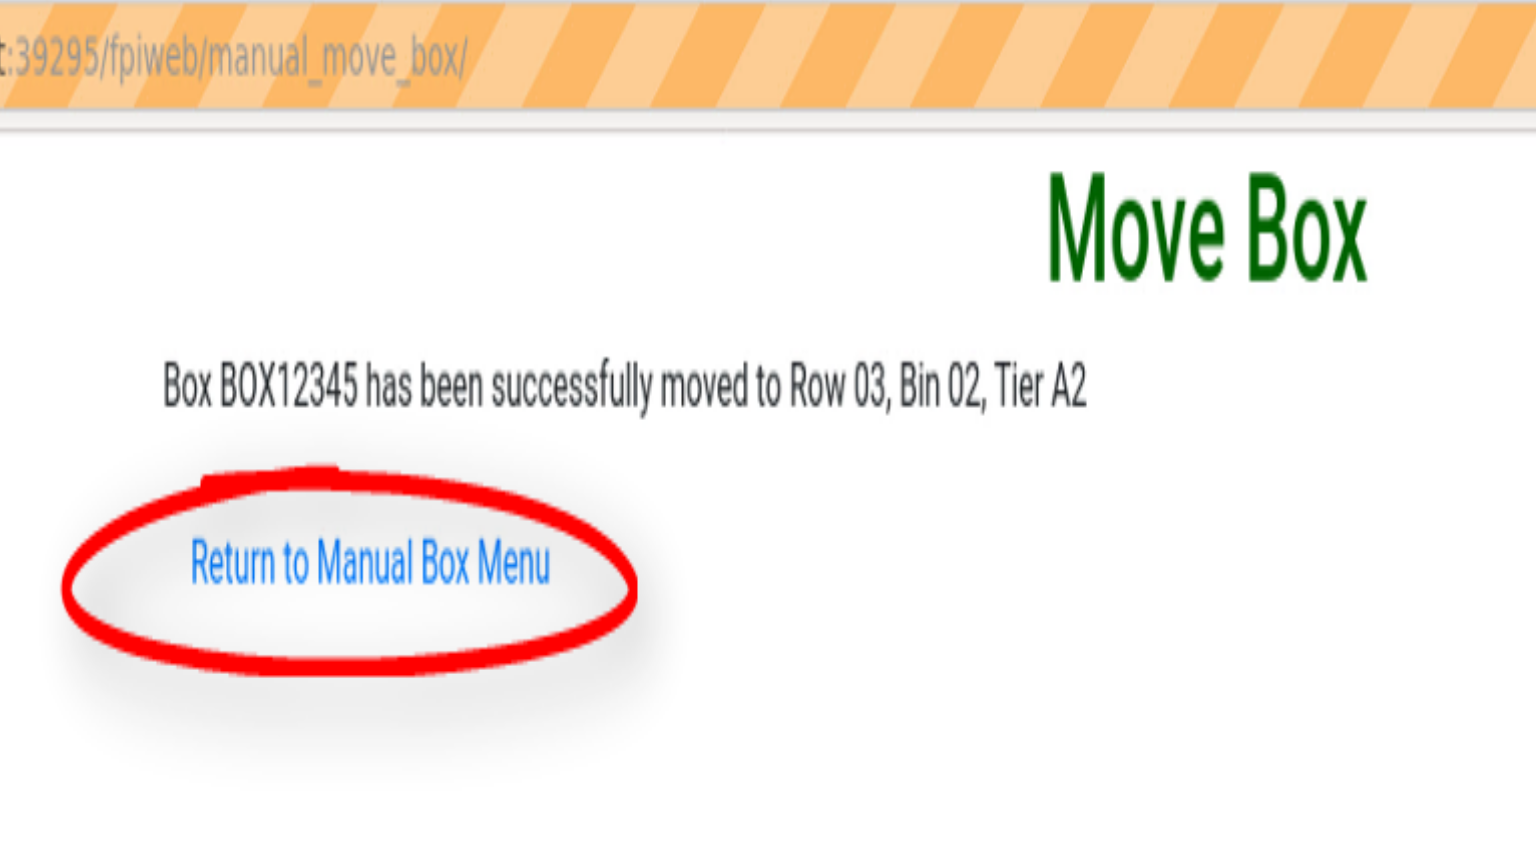
Move Box Screen
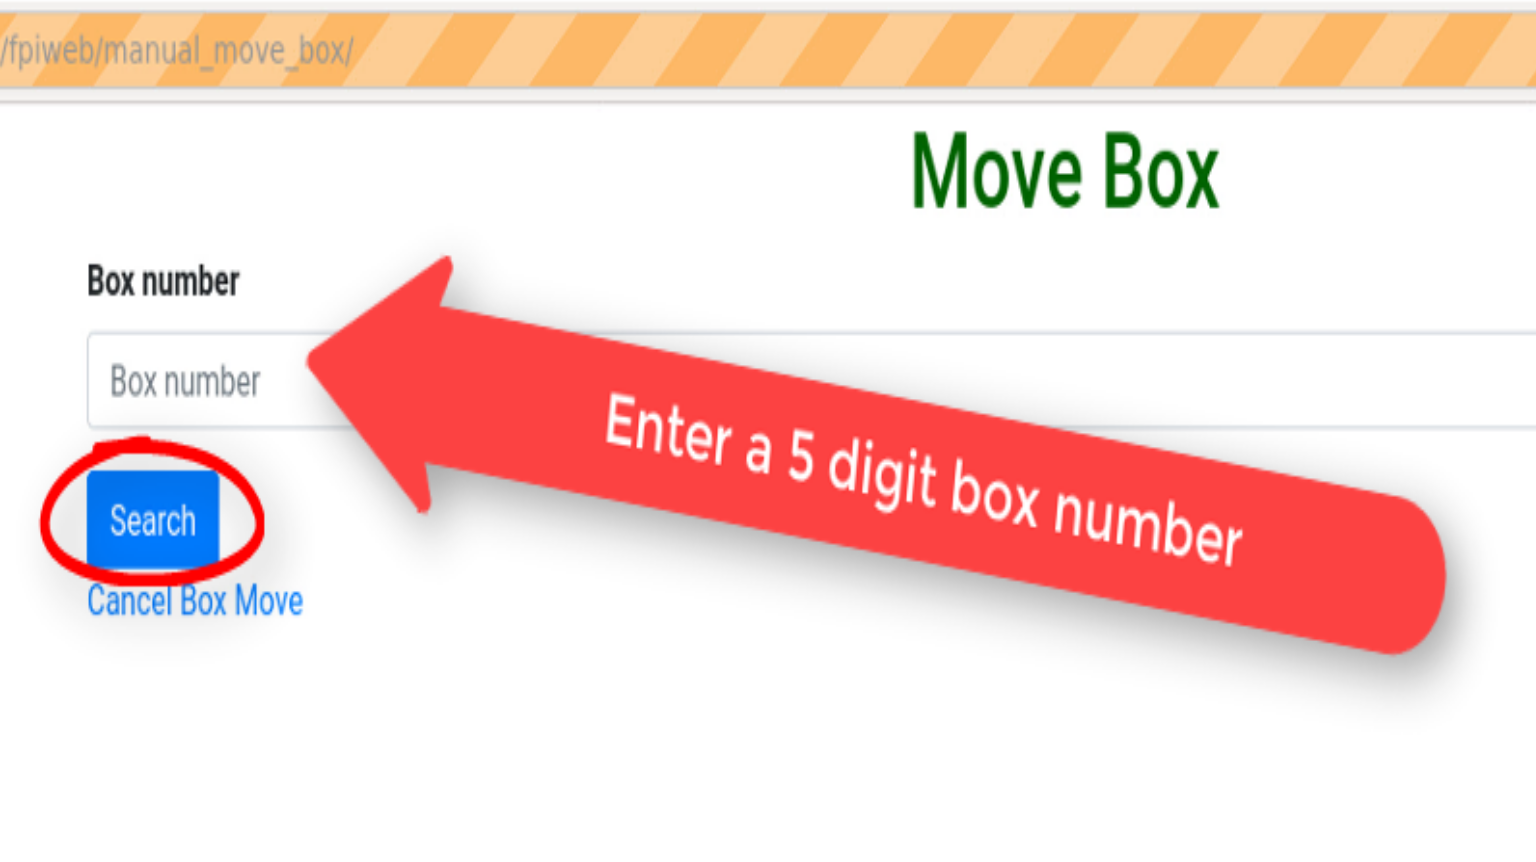
To move a box to a different pallet enter the 5 digit box number in the Box Number field and then click on the blue Search button.
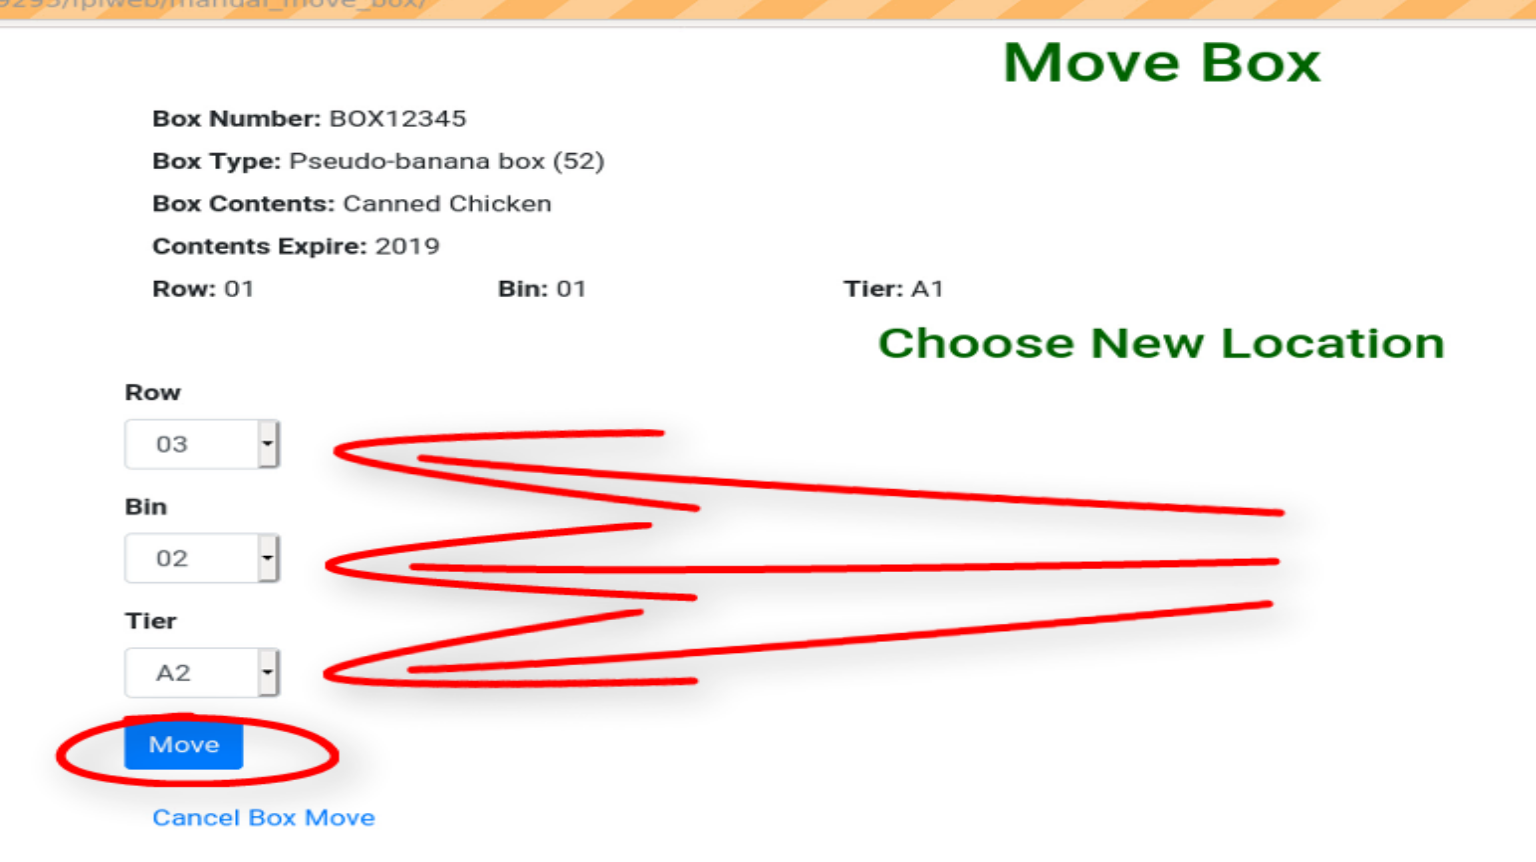
The next Move Box screen contains all the box information. In this screen you can choose a new location by entering new Row, Bin, Tier locations. Click on the small triangle to the right of each Row, Bin, Tier to get your drop down list choices. After choosing your new location entries click on the blue Move button to change the information in the database.
If there are no errors you should see a screen similar to the one below. Click on the Return to Manual Box Menu link to return to the Manual Box Management screen.
In case of error you will see a screen similar to the one below with an error message. Click onthe Cancel Box Move link to return to the Return to Manual Box Menu.